How to Fix iTunes Error 1600?
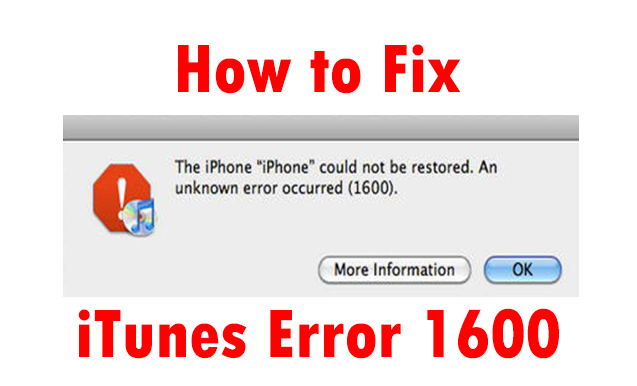
iTunes is the wildly used software among iOS users, which can help update iOS system, restore iPhone. Have you ever come to a situation when you are trying to restore your iPhone but iTunes pop up an error 1600 window? It is a common issue and it usually occurs when you remove a jailbreak or restore your iOS device. If you are troubled by this problem, you land on the right page and I'm going to show you several ways to Fix iTunes Error 1600.
Update your iTunes on computer
If you are using an old version of iTunes, it may cause this problem. If your iTunes pop up the window Error 1600, it will be a nice choice for you to update your iTunes. You can update as the following steps guide.
Update iTunes on Win
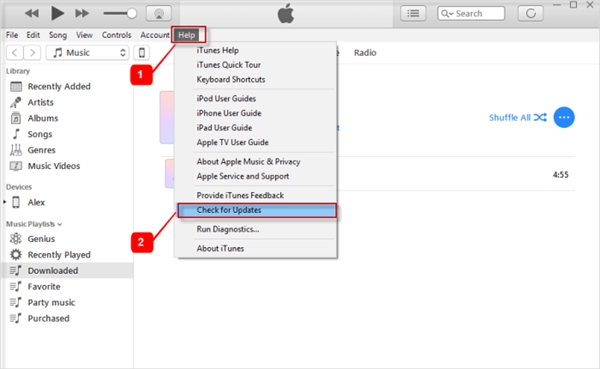
Step 1: Run iTunes
Step 2: Click the Help button
Step 3: Check for Updates
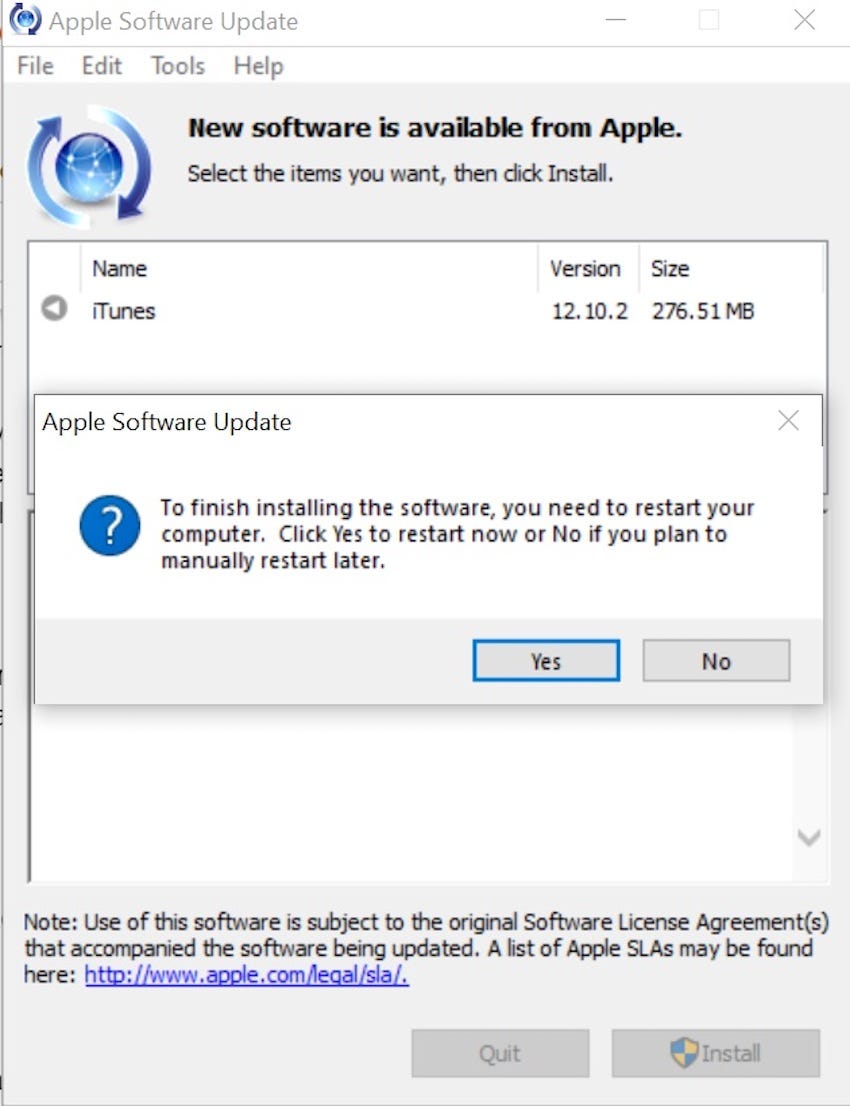
You can see details in this pop-up window, click the Install option to update your iTunes on PC.
Update iTunes on Mac
For Mac, the method updating iTunes is a little different from Win. If you are a Mac user, read the step-by-step tips below.
Step 1: Open the Mac App Store
Step 2: Click the Updates tab
Step 3: If iTunes updates are available, click the Install tab.
Restore your iPhone via DFU Mode
If you are an iOS user, you may know that there are two modes for you to restore our iPhone, one is Recovery Mode, the other one is DFU mode. What's different between the two modes? The main difference between Recovery Mode and DFU mode is iBoot. iBoot is the bootloader on an iOS device. When you are trying to restore your iOS device in Revocerymode, iBoot will be used while DFU mode bypasses the iBoot. Put your iPhone in DFU mode in the following steps.
For iPhone 8, iPhone 8 Plus, iPhone X, iPhone XS, iPhone 11, iPhone 11 Pro, iPhone 12 and iPhone 12 Pro:
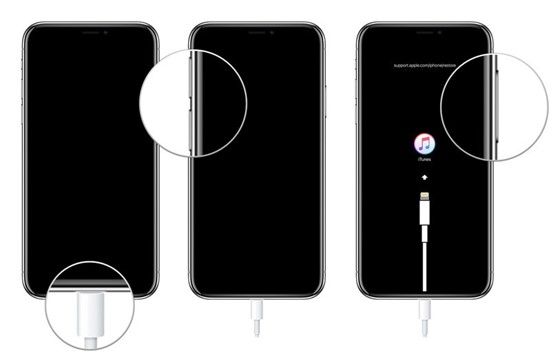
Step 1: Connect your iPhone with your computer via USB cable.
Step 2: Quick-press Volume Up button, and quick-press Volume Down button. Hold the Side button until you see the black screen.
Step 3: Press and hold the Side button and Volume Down button simultaneously for 5 seconds.
Step 4: Release the Side button and keep holding the Volume Down button for 5 seconds.
Step 5: Your iPhone screen will stay black, once your iPhone enters DFU mode, iTunes will display a message that your iPhone has been detected.
For iPhone 7/ iPhone 7 Plus:
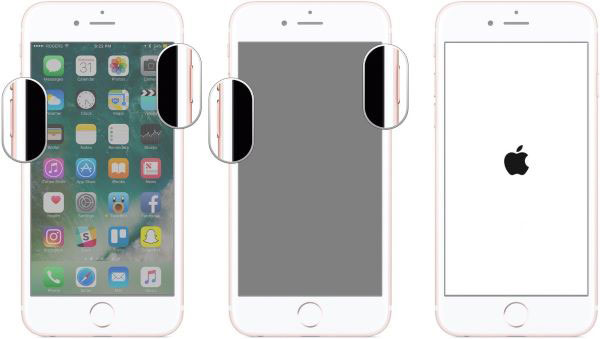
Step 1: Hold the Side button and Volume Down button simultaneously for 8-10 seconds.
Step 2: Release the Side button and keep holding the Volume Down button for 5 seconds.
Step 3:Your iPhone screen will stay black, once your iPhone enters DFU mode, iTunes will display a message that your iPhone has been detected.
For iPhone 6s and below:
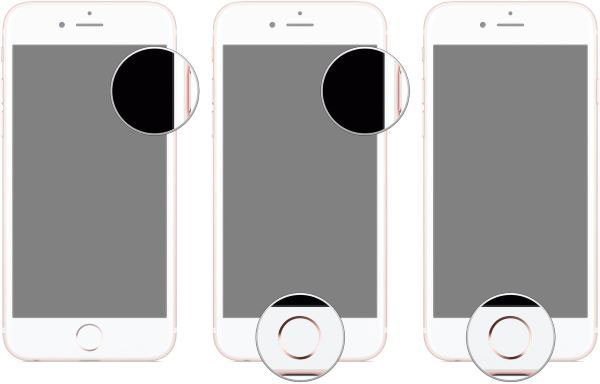
Step 1: Hold the Side button and Home button simultaneously for 10 seconds.
Step 2: Release the Side button and keep holding the home button for 5 seconds.
Step 3: Your iPhone screen will stay black, once your iPhone enters DFU mode, iTunes will display a message that your iPhone has been detected.
When your iPhone is in DFU mode, restore it via iTunes.
Use TunesKit iOS System Recovery to Fix iTunes Error 1600
If the above methods not working, it seems that a nice choice for you to download an iOS system recovery tool to fix your iPhone. I recommend TunesKit iOS System Recovery for you. As a professional iOS system recovery tool, TunesKit can fix most of the iOS issues easily. If you had every bordered by iPhone stucks on the Apple logo, boot loop, Wi-Fi not working, iPhone no service, TunesKit can be the best choice for you. What's more, not only iPhone but also iPad, Apple TV, iPod can be fixed easily and quickly by TunesKit iOS System Recovery.
Key Features of TunesKit iOS System Recovery
- Fix 50+ iOS and TVos issues.
- Two repairing modes: Standard Mode and Advanced Mode.
- Supports different iOS devices like iPhone,iPad and iPod.
- Compatible with all iOS versions including the iOS 14.
- One-click to enter or exit the Recovery mode for free and downgrade iOS versions.
- Lifelong free update and easy-to-operate interface.
Here is the detailed tutorial fixing iTunes error 1600.
Step 1 Connect your iPhone with computer via USB cable

Launch TunesKit iOS System Recovery and connect your iPhone with the computer, click the Start button to the next step.
Step 2 Select Recovery mode
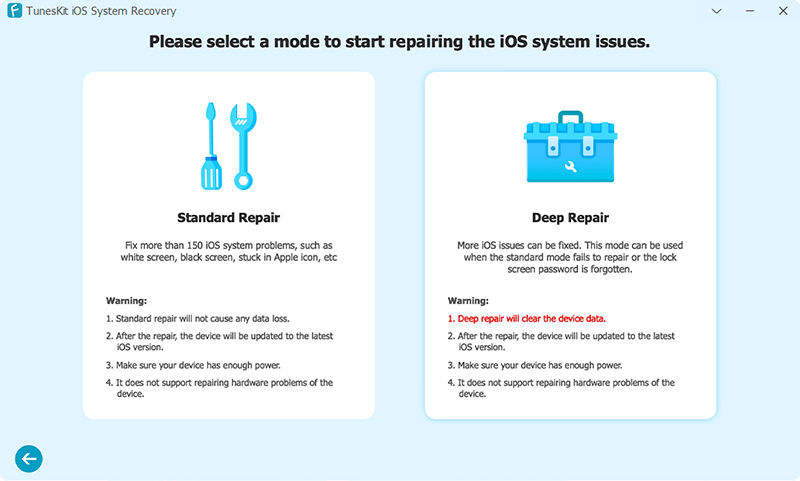
There are two options for you to select. The difference between the two modes you need to know is that the Advanced Mode will erase all of your iPhone data after the recovery. Use Advanced Mode in the premise of Standard Mode not working.
Step 3 Download firmware package
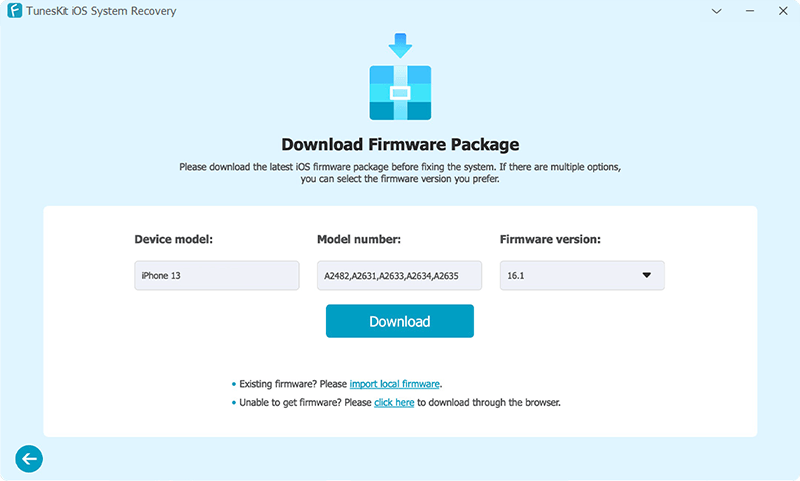
Check up the information given is the same with your device, if not, correct it manually.
Step 4 Fix your iPhone
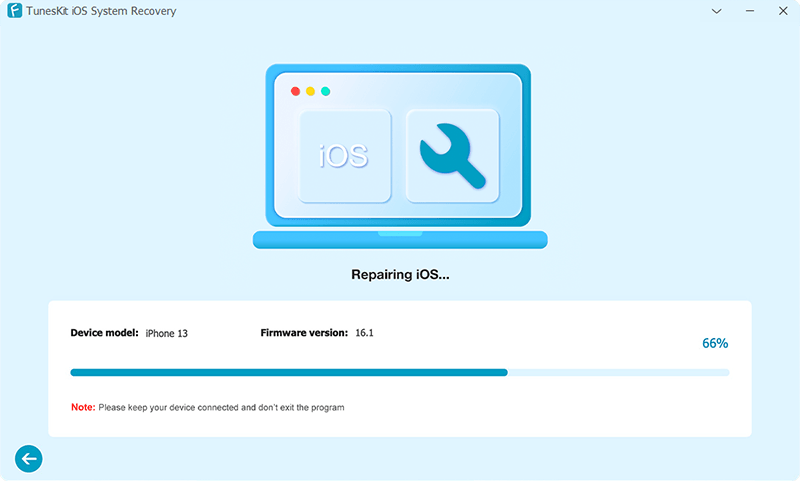
Done the downloading, TunesKit will start to fix your iPhone. When the fixing process is done, your iPhone is back to normal again.
Conclusion
When you read here, I think you had fixed your iPhone successfully. iTunes error is a normal issue among iOS devices, if you meet it again, you can use similar ways to fix it by yourself. In my opinion, you can install TunesKit iOS System Recovery on your PC or Mac, not only fixing iTunes error 1600 but also any other iOS software issues such as iPhone Map not working, iPhone Bluetooth not working, iPad running slow, Apple Music not working, etc. Different from the professional features, you can fix your iOS device without expertise requirement. If you meet the hardware issue, it would be a better choice for you to connect Apple Support Center.
