[iOS 18/17] iPhone Software Update Failed? Fix it with Ease!
Every year, particularly with iOS devices, software updates consistently fail. Apple users often get this issue of "iPhone Software Update Failed" while attempting to upgrade their software. Now, iOS 17 as well as iOS 18 Beta updates are available, once again users have high hopes of experiencing a slew of new capabilities on their Apple devices. On the other hand, you can get an iPhone update problem while upgrading to iOS 17.
But, don't worry if your iPhone seems to be stuck while updating. This article is your go-to resource for fixing software update issues on your iPhone. So, listen up as we detail the whole process. The six methods outlined here may help you fix iPad/iPhone software update issues and go back to using your device normally. In that case, let's not waste any more time and explore the best iPhone software update failure solutions.
Part 1. Why iPhone Software Update Failed?
iPhone software update failed issues happens for a variety of reasons. Here, we list the most frequent ones you're likely to encounter.
1. Device Shut Down During the Process – If you power off your smartphone during the updating process, the issue arises. Disruption to the procedure rendered the iPhone software upgrade ineffective.
2. Unable to Connect to the Apple Update Server – When trying to update the software on your iPhone, the Apple update server could not establish a connection with it. There is an Apple server problem that many users must experience sometimes.
3. Less Storage Space – Unfortunately, your device doesn't have enough free space.
4. Wrong Network Connection – The network your phone is attempting to connect to may be down, or your phone may not have an active internet connection. This may occur if you're using a cellular data plan and aren't near a Wi-Fi hotspot.
Part 2. Fix iPhone Software Update Failed via TunesKit iOS System Recovery
When fixing your iOS system, go no further than TunesKit iOS System Recovery. TunesKit iOS System Recovery allows you to swiftly and easily resolve over 150+ common iOS problem on your own, without the need to contact an Apple technical support representative. This iOS repair tool will get you out of whatever jam you find yourself in, whether iOS 18/17 software update failed, stuck in recovery mode, DFU mode, white Apple logo screen, or if your screen goes dark, blue, frozen, or disabled.
In addition, you may use TunesKit iOS System Recovery to scan for iOS issues and restore a compromised operating system. The tool offers two distinct modes, the Standard Repair and Deep Repair for Windows and Mac, making it possible to cure both simple and complex iOS issues in a matter of minutes. Not to mention, the recovery process is 100% secure, which means you don't have to worry about any data loss.
Characteristics of TunesKit iOS System Recovery:
- Fix iPhone software update failure in no time
- Restore an iOS device to factory settings without losing any data
- Repair 150+ iOS problems such as Apple logo not appearing, etc.
- Allows iOS devices such iPhone, iPad, or iPod to enter and exit recovery mode in one click
To inspire you, below is a step-by-step tutorial on how to fix iPhone software update problem using the amazing TunesKit iOS System Recovery.
Step 1Connect iPhone to Computer
First, download and launch TunesKit iOS System Recovery on your computer. Now, connect your iOS device iPhone to the computer through the USB cord.

Step 2Select Repair Mode
Once TunesKit detects your device, choose a mode from the two options, "Standard Repair(no data loss)" and "Deep Repair (erase all data)" and click Start.
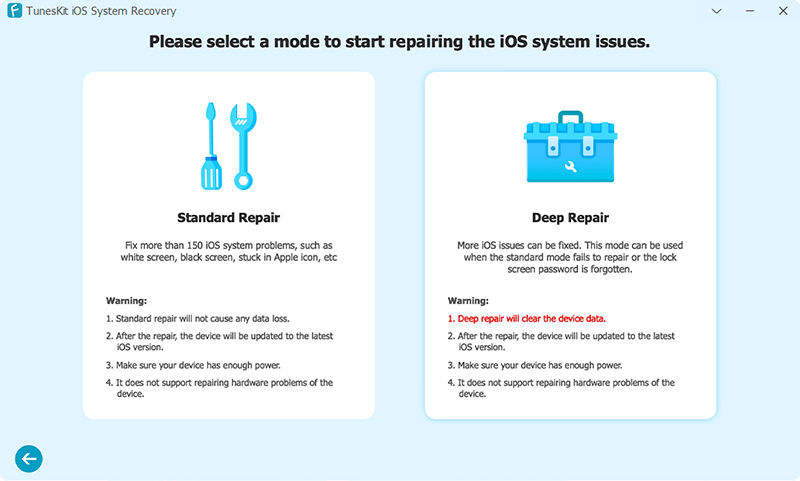
Note: Then, follow the on-screen directions to boot your device into DFU mode.
Step 3Download Firmware Package
Next, confirm your device information manually and search for a compatible firmware package of your choice. Hit the Download button to download the firmware package.
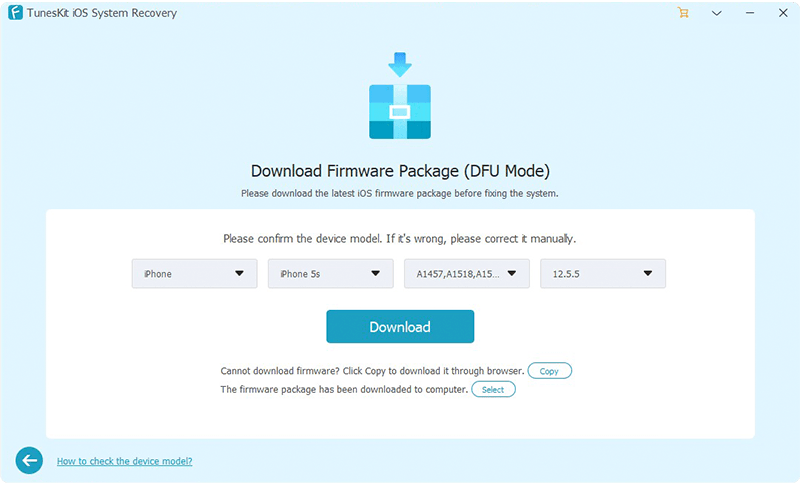
Step 4Repair iPhone Update Failed without Data Loss
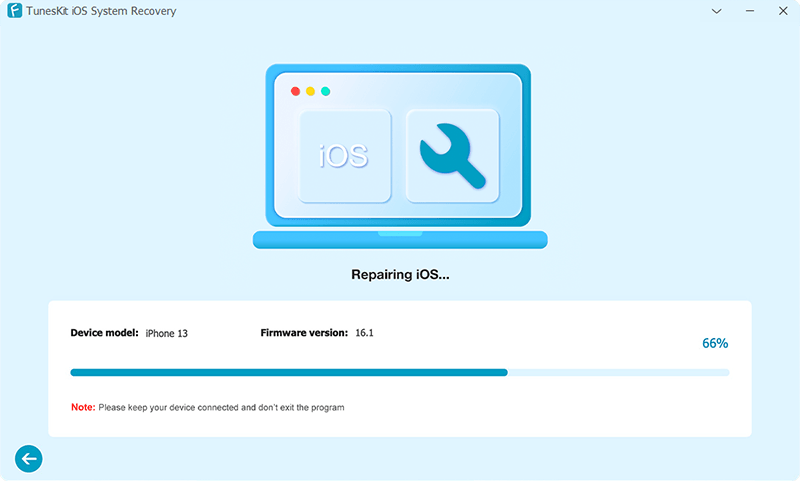
When the download completes, click on the "Repair" button to begin fixing the iOS system. Make sure not to disconnect your device mid-process.
Part 3. How to Fix iPhone Software Update Failed?
The following are some of the best practices to implement if your iPhone is facing trouble while updating the new iOS software.
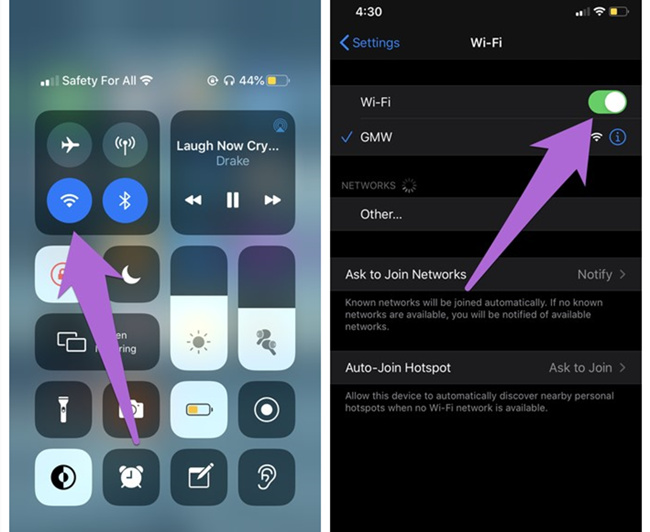
Method 1. Check Network Status
First and foremost, check your device network status. This is the simplest yet most effective solution to fix software issues, especially the update failure. Start with the following steps:
Step 1: First, ensure your Apple device can connect to the Internet.
Step 2: To download iOS 17, avoid using cellular data or an unsecured Wi-Fi network. If the Wi-Fi is excessively unstable, your iPhone won't update and will claim there is no Internet connection.
Method 2. Wait for a Few Hours
Since iOS 17 & iOS 18 Beta launch, the new iOS has been eagerly awaited. Because of this, once an update is released, millions of people worldwide immediately begin downloading it.
Due to the high volume of updates, Apple's servers may get overloaded, so iOS 17 & 18 software update failed on your iPhone. If you are having trouble upgrading your iPhone, it may be wise to wait until the problem has been resolved before trying again.
Method 3. Close Settings App and Update Again
Next up is closing the settings application and trying to update again. Sometimes updates fail and Apple devices get stuck due to issues in certain applications. For this reason, it is a good idea to restart the settings app. When the "Software Update Failed" pop-up appears on your phone, you will find two options, "Close" and "Settings".
Step 1: To dismiss this error notice, choose "Close" and wait a minute or two.
Step 2: Then try selecting "Download and Install" once again. If the problem persists this time, exit the program and relaunch it.
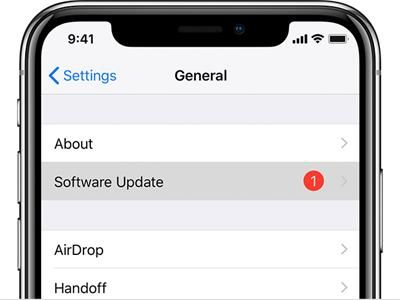
Method 4. Free Up iPhone Storage
Your iOS 17 download may fail if your device runs short on storage space. This is because it can't save the most recent iOS data. Deleting old files is a good way to make room for new ones.

Method 5. Update iOS via iTunes
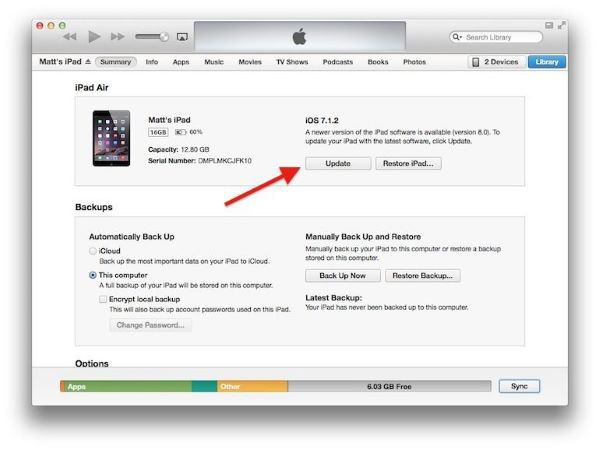
The next step includes utilizing iTunes if you are still stuck with the iOS update failed issue. Using iTunes to resolve the update failure problem might be a quick and simple solution. If you're having trouble updating your iOS, try these steps to fix the issue.
Step 1: Download and install the most recent version of iTunes on your computer.
Step 2: Then launch the iTunes program and connect your Apple device to your computer. iTunes will automatically detect your device.
Step 3: Now, select "Summary" from the available choices, and press Check for update to see if any newer versions are available. If an option to download and update appears on your screen, choose it.
Method 6. Update via IPSW File
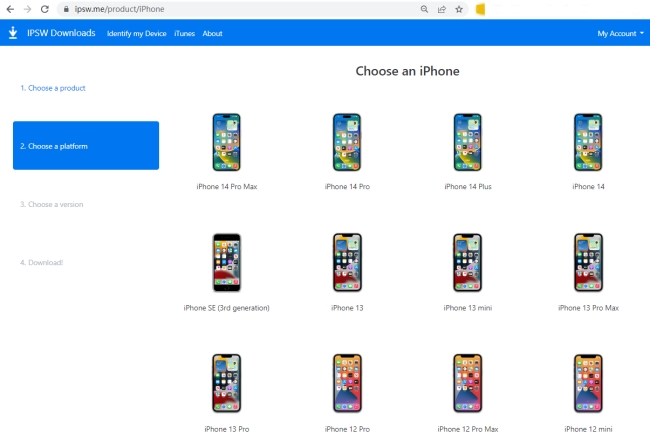
IPSW files can be used with iTunes or Finder on macOS 10.12 or later or with Windows. Just make sure that you have the most recent version of iTunes installed on your computer before attempting to upgrade or restore an iOS or iPadOS device using IPSW firmware files.
Step 1: Connect your Apple gadget to your PC.
Step 2: Click on the device and open it in iTunes or Finder.
Step 3: Click "Update" while holding the "Option" key on a Mac.
Step 4: Click "Update" while holding the "SHIFT" key on a Windows computer.
Note: You'll need to choose the IPSW file you downloaded earlier. Proceed with the standard iOS upgrade.
Method 7. Delete Update File and Download iOS 17/18 Beta Again
Are you still experiencing iPhone software update failed? Then you can try the last method which is to remove the iOS update file and then download the update again. Here are the exact steps.
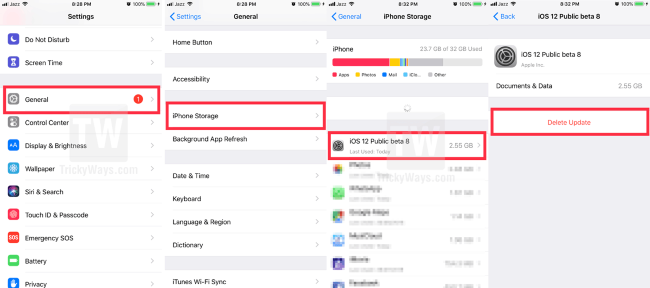
Step 1: Open the Settings app on your iPhone. Then tap General > iPhone Storage.
Step 2: Scroll down to find and tap the iOS update file.
Step 3: Tap Delete Update button. Follow the on-screen prompt to remove this iOS update file.
Step 4: Move to Settings > General > Software Update to download and install the latest iOS update again.
Part 4. Conclusion
Getting to the bottom of why iPhone software update failed might be time-consuming. But totally worth it. Next time when you face this issue, follow the strategies outlined in this article to fix the problem independently. TunesKit iOS System Recovery is worth a go if nothing else helps. The problems may be resolved with only a few clicks of the mouse.
