Full Solutions to Fix iPhone Error 21
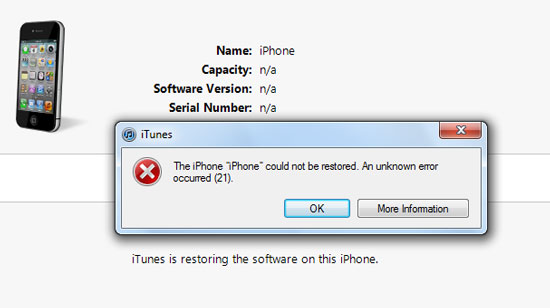
Are you often met with this situation that a message which reads "the iPhone 'iPhone' could not be restored, an unknown error occurred (21)" pops up when you tried to restore your iPhone, iPad or other devices? Then you start the process again and the note keeps showing up. Want to fix the problem effectively? That’s exactly what you are going to learn here.
Part 1. What is iPhone Error 21?
First, we have to understand what iPhone error 21 is. iPhone error 21, equals to iTunes error 21, is an error happening when you want to update or restore your iPhone, iPad and iPod. To be specific, an authentication is stopped when your iTunes is in the middle of downloading and checking the firmware files.
Part 2. Why iPhone Error 21 Appears When Restoring iPhone?
Now you might be wondering why iPhone or iTunes error 21 appears when you restore your iPhone? That’s what we are going to discuss next. Followings are some possible reasons to explain the iPhone error 21 or iTunes error 21.
1. An improper iTunes download or installation.
2. Virus attack or malware infection.
3. Mistaken deletion of related files.
4. Corruption in the Windows registry.
5. Hardware errors.
Part 3. Most Efficient Way to Fix iPhone Error 21 Without Data Loss
Now that we have find out some reasons that cause iTunes error 21, how can we get the problem solved while keeping our data? Professional iOS system repair software like TunesKit iOS System Recovery is able to do the trick. This tool supports diverse kinds of iOS issues including iPhone recovery mode , white Apple logo, black screen, Apple TV issues, iTunes error etc. Moreover, it supports diverse devices like iPhone, iPad, iPod touch and Apple TV, and all iOS versions, including the latest iOS 13. Finally, it has a simple interface which is easily understood and operated by customers.
Related steps to fix the problem of iPhone error 21 are as follows.
Step1: Firstly, you have to click and open TunesKit iOS System Recovery app. Then make your iPhone connected and detected. Next, click "Start" button. Next, choose the "Standard Mode" and "Next". You have to select which device you've connected. Then put your device into DFU mode. After that, click "Next" button.

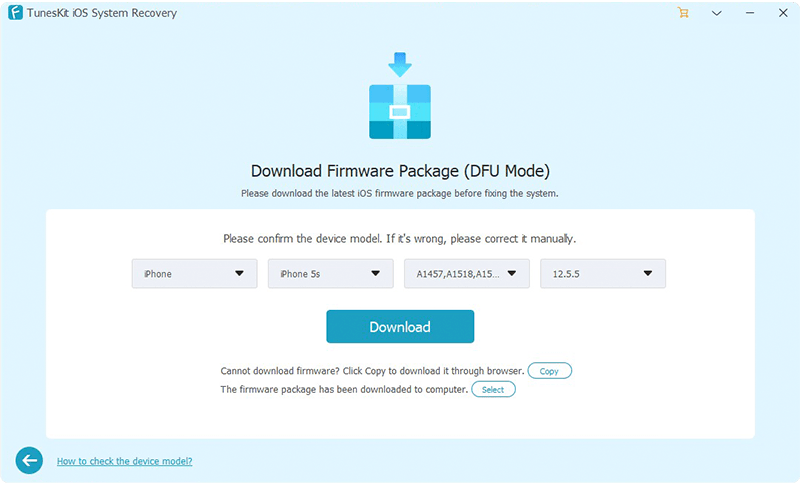
Step2: The firmware package matched to your device will be downloaded after finishing the first step. Before that, you have to check your device info. You can correct it if there's anything wrong. If all information is correct, click the "Download" and it will start downloading and verifying the firmware.
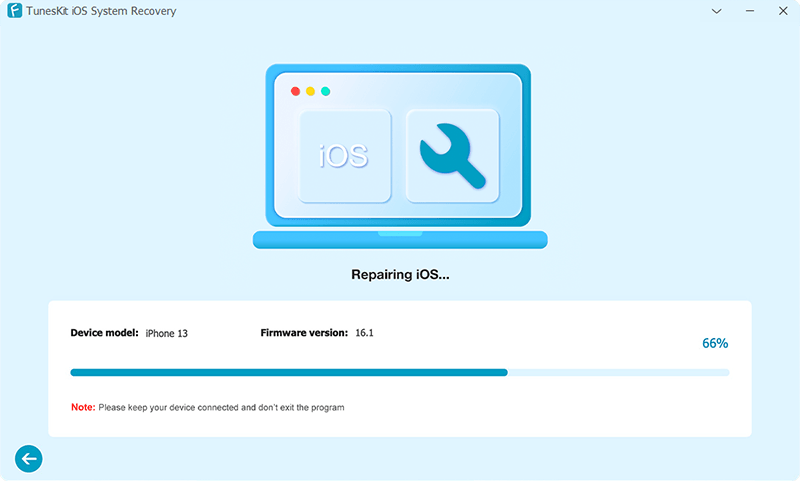
Step3: Click the "Repair" button after downloading the package and your iPhone will begin being fixed. Keep your device connected till the process is completed. Otherwise, the device might become bricked.
Part 4. Other Common Solutions to Solve Error 21 Problem
If you want to solve iPhone error 21 problem without using the third-party tools, the you could get some value from other common fixes.
4.1 Update iTunes to the latest version
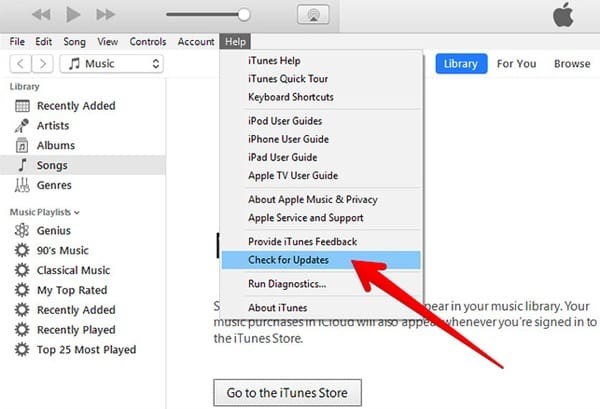
Outdated iTunes version sometimes may give rise to iTunes/iPhone error 21, because it is not compatible with the latest version of iOS device. Now it’s time to update it. To start updating, you just first open iTunes app, and then click check for update in help icon, lastly follow the guide and you will finish the process.
4.2 Disable anti-virus to fix iPhone error 21
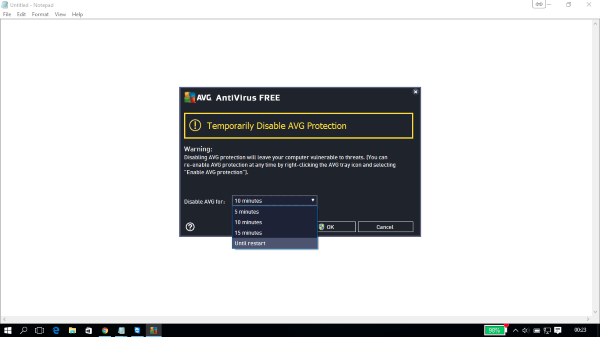
It may be a little risky to turn off anti-virus because it does a good job to our computer’s security. But it sometimes keeps some significant programs to functioning. Do as follows to solve the problem.
Step 1: Open the firewall of your anti-virus program and check if iTunes or computer firewall is on the list.
Step 2: Turn off anti-virus.
4.3 Put your iPhone into DFU mode
If everything is Ok, then you could try to hard reset your iPhone by putting it into recovering mode. But it’s worth mentioning that this method will remove all your data and information. Thus it had better to backup your iPhone before going at this process.
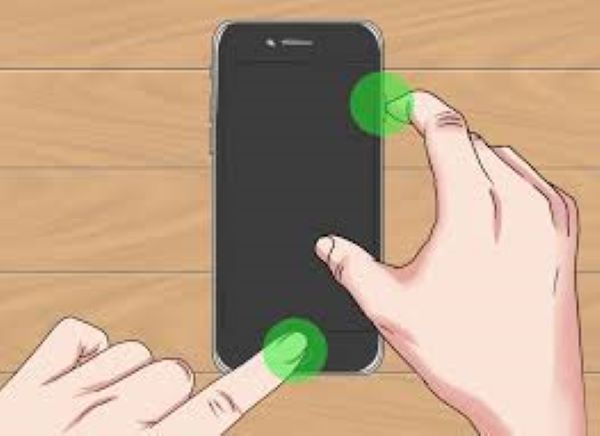
Step 1: Put iPhone into DFU mode
1. Press Power button for 3 seconds.
2. Press and hold the power and home button simultaneously for 15 seconds.
Note: for iPhone 7 and iPhone 7 plus, press power and volume down button; for iPhone 8 and later, press volume up and down button respectively before holding power button.
3. Release power button and hold home button only.
Step 2: Make your iPhone connected to iTunes
Step 3: Restoring your iTunes
4.4 Check the sensor cable
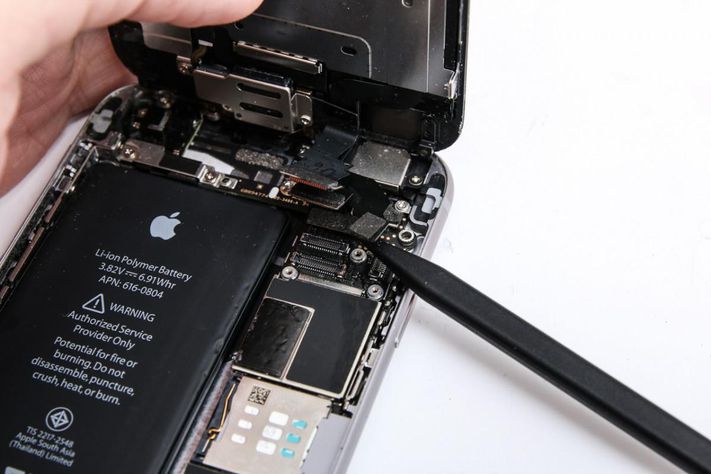
If above relatively simple methods don’t work, then you could try this difficult way to fix iPhone error 21. It might be the fix you want. But generally this way is not recommended because if uncarefully, the iPhone will get broken.
How to check sensor cable
1. Open up your iOS device.
2. Take away the screw that keeps the battery.
3. Disconnect a device cable and connect it again.
4.5 Examine host files
In some cases, your host file is blocking iTunes to communicate Apple's update server. So to make sure it is not stopped from contacting. This can be done by following steps.
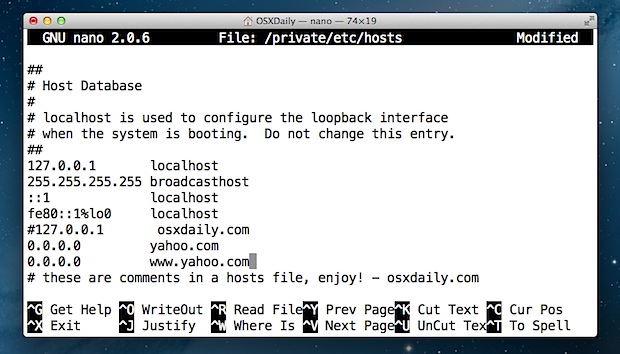
For Mac users, you need to follow these steps:
1. Open Applications and click Utilities.
2. Open Terminal.
3. Type sudo nano /private/etc/hosts command.
4. Input password.
5. Find out an entry.(If there is no entry, then no problem exist; if an entry is found, the remove "gs.apple.com". )
For Windows PC customers, you have to try these steps:
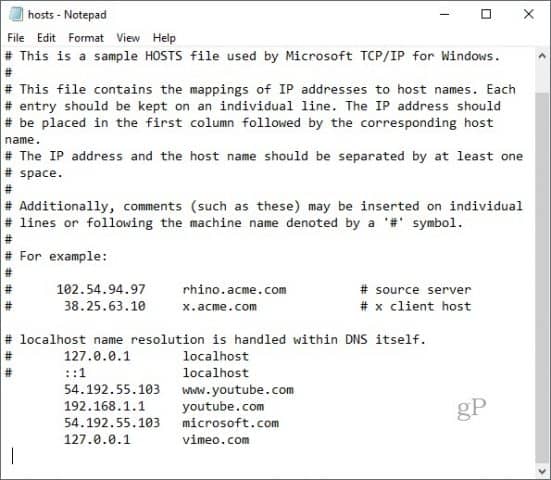
1. Press Key + R.
2. Type C:\Windows\System32\drivers\etc\hosts.
3. Use Notepad to open files.
4. Find out an entry.(If there is no entry, then no problem exist; if an entry is found, the remove "gs.apple.com". )
Part 5. Final words
To sum up, we hope above listed methods can help you to get iPhone or iTunes error 21 solved. But some of these solutions will lead to data loss and sound risky and difficult to operate such as check files and security programs. So you are suggested to use the effective iOS system repair tools like TunesKit iOS System Recovery to fix the problem. Or if you have other alternatives we missed, welcome to connect us and share your ideas.
