How to Fix iPhone Camera Not Working on iOS 18
"After the iOS 18 update, my iPhone camera has been significantly laggier but the most infuriating thing is that when I try to take a picture by pressing the shutter button, the screen instantly goes black and then the camera app crashes." – A user from Reddit
That user is not the only one who also encounters similar camera issues including camera crashing, not taking pictures and videos, going black, lagging, etc. after updating iPhone to iOS 18. Obviously, it is annoying if we cannot take pictures and videos normally with our iPhone camera. Fortunately, there are several troubleshooting steps you can follow to fix iOS 18 camera not working. Whether you're trying to capture memories, use FaceTime, or scan QR codes, the following solutions will help you normalize those features on your iPhone.
Part 1. Why My iPhone Camera Not Working on iOS 18?
1. Software Bugs: iOS updates can sometimes introduce bugs that affect device functions, including the camera. If iOS 18 has known issues, Apple may release future updates to address these problems.
2. Apple Compatibility Issues: Some third-party apps may not be fully optimized for the new iOS update, leading to camera malfunctions when using those apps.
3. Camera Permissions: After updating, certain apps may lose access to your camera due to updated privacy settings. If apps don’t have permission to access the camera, they won’t be able to use it, even though the camera itself works.
4. Glitches or Freezing: The Camera app may freeze or become unresponsive due to background processes or memory overload, especially right after a major iOS update.
5. Settings Conflicts: Sometimes, settings may conflict with the new iOS version, causing the camera to malfunction.
6. Low battery or overheating: If your iPhone is running on low battery or has overheated, iPhone will temporarily disable the camera to conserve power or protect the device.
7. Hardware Issues: While less common, the camera not working could also indicate a hardware issue that coincidentally started around the time of the iOS update. This could include damage to the lens, camera sensor, or internal components.
Part 2. How to Fix iOS 18 Camera Not Working on iPhone
Even though it can be hard to determine the exact cause of your camera problems, it is nevertheless worthwhile to attempt the following fixes to restore normal operation to your iPhone camera.
Fix 1. Restart iPhone
Restarting the iPhone can fix numerous small problems that arise while using it and update the operating system. Frequently, the camera problem could be caused by a transient software error or interference from a background activity.
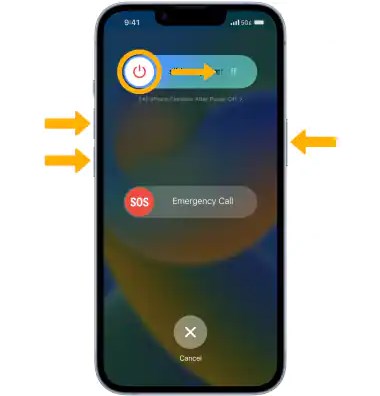
Step 1: Press and hold the volume and power buttons until a slider appears.
Step 2: You must slide the slider to switch off your iPhone.
Step 3: To restart it, hold down the power button until the Apple logo appears.
Fix 2. Check for App Permissions
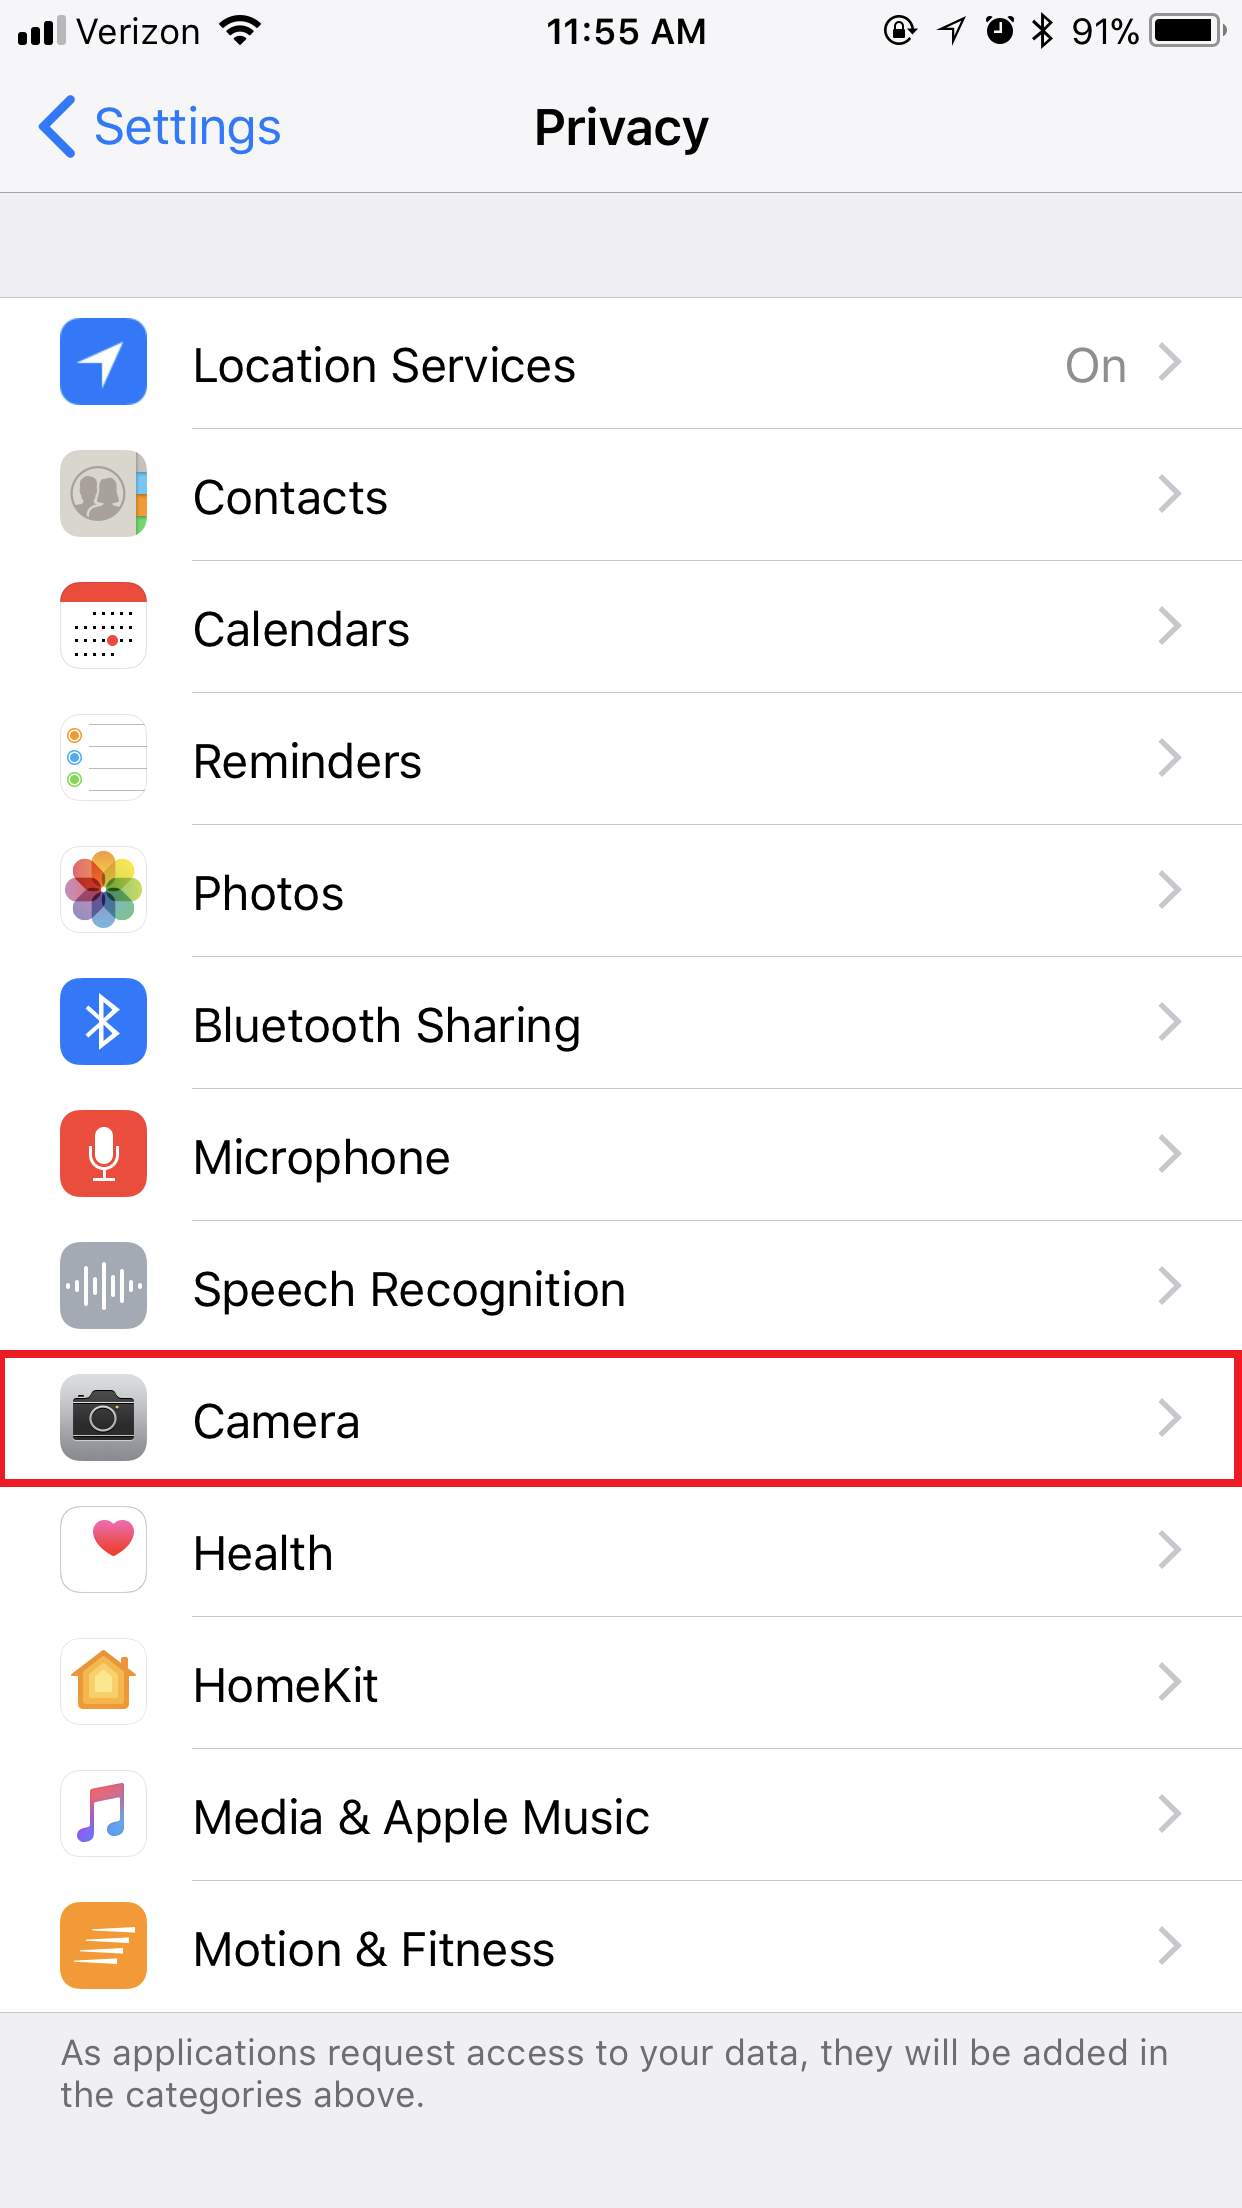
Occasionally, privacy settings or iOS updates prevent certain apps from using the camera. If apps are denied camera access, they won’t function properly, which can appear as if the camera isn’t working. To fix that, simply make sure the camera is turned on for the apps you wish to use: Settings > Privacy > Camera.
Fix 3. Force Close Camera App
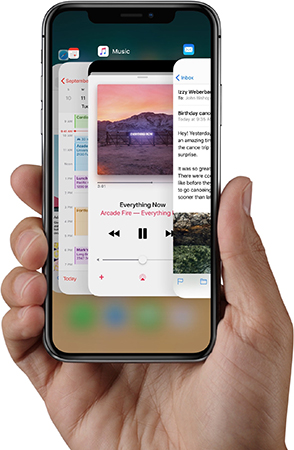
Occasionally, the Camera app may crash or freeze due to an overload of tasks or background processes, leading to unresponsiveness. The app will not function as intended while it is stuck.
Step 1: The app switcher is accessed by swiping up from the bottom of the screen.
Step 2: Locate the Camera app, then swipe up to end it.
Step 3: Open the Camera app again.
Fix 4. Reset All Settings
Resetting all settings may be helpful if your camera problem is caused by a misconfigured setting or a more serious system issue. Sometimes, issues arise from complex, user-modified settings that affect system performance, including the camera.
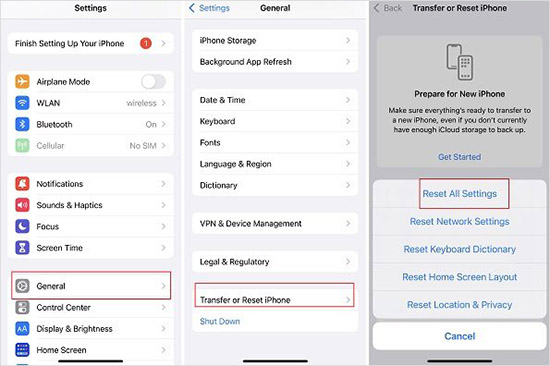
Step 1: Locate the General option in the Settings app.
Step 2: Select General > Transfer or Reset iPhone > Reset > Reset to reset all settings.
Fix 5. Check for Physical Obstructions
Camera functionality might be hampered by external factors such as dirt, debris, or cases covering the lens. Sometimes, these issues are overlooked because they aren’t software-related. If it is the reason, you should clean the lens and remove any obstructions to allow the camera to capture clearer images.
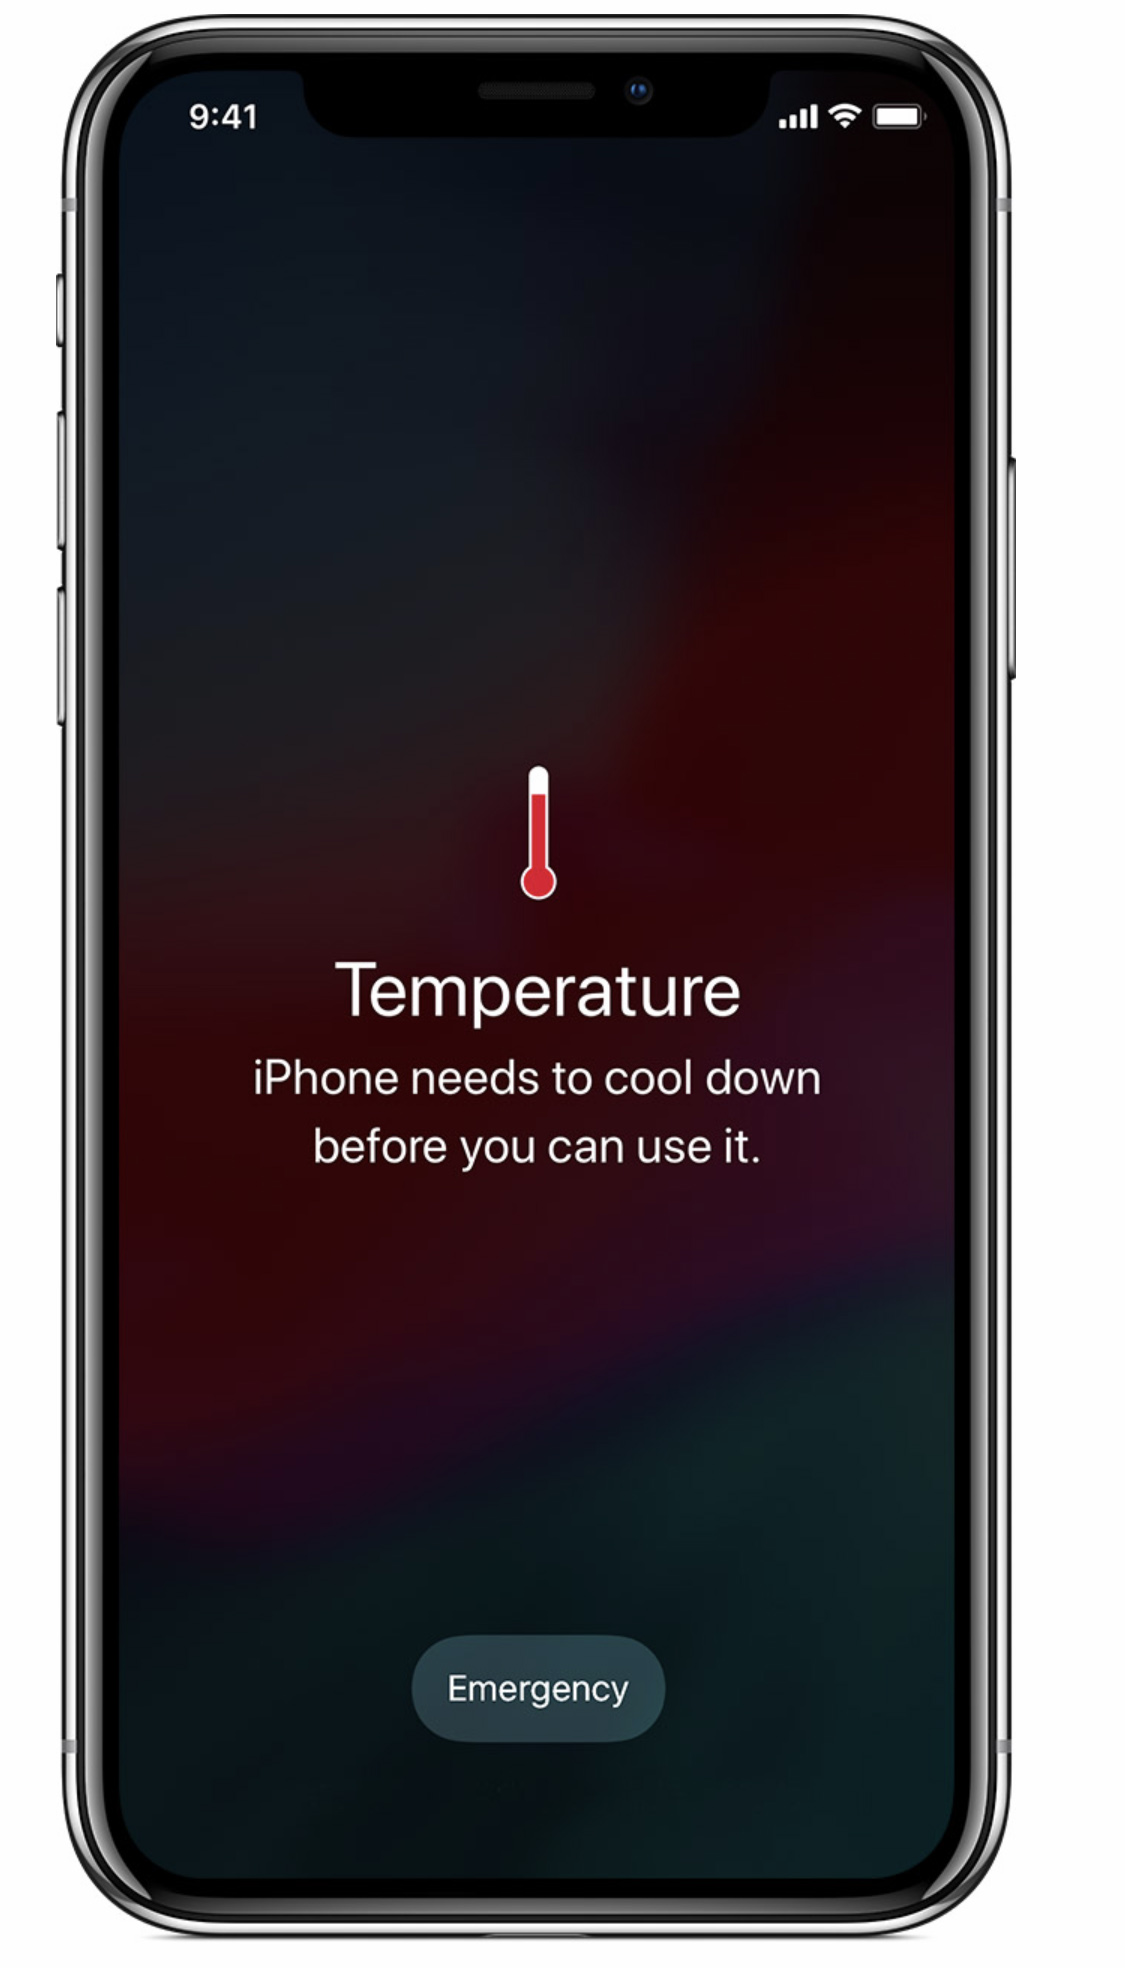
Fix 6. Cool Down iPhone / Charge iPhone
If your device is overheated or has a very low battery, the camera might not function properly. Allowing your phone to cool down or charging it can restore camera functionality.
Fix 7. Disable Third-Party Camera Apps
The most recent version of iOS may not always be compatible with third-party apps that use the camera. Incompatibility issues can lead to camera crashes or malfunctions, affecting both the third-party app and the native Camera app.
Step 1: Try using the default Camera app to see if the problem is specific to third-party apps.
Step 2: The third-party software is probably the issue if the built-in Camera app functions well. You can either wait for updates aimed at resolving this issue or reinstall the third-party program.
Fix 8. Restore iPhone to Factory Settings
Although a factory reset is a more extreme step, it can be helpful if all other options have been done. This process eliminates all potential software conflicts and issues that have developed over time, including those affecting the camera.
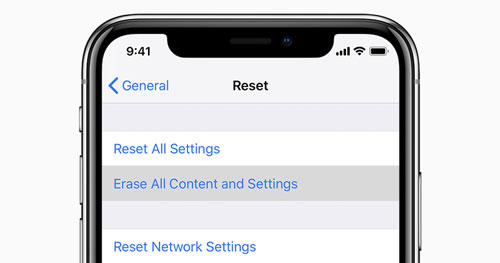
Step 1: You should backup your iPhone's data using iCloud or iTunes before restoring it to factory settings, as this will erase all of its contents.
Step 2: Choose General > Transfer or Reset iPhone > Erase All Content and Settings from the Settings app.
Fix 9. Check for iOS Updates
Apple frequently releases software upgrades that enhance functionality and address issues. The camera may have problems if the iOS version is out of date.
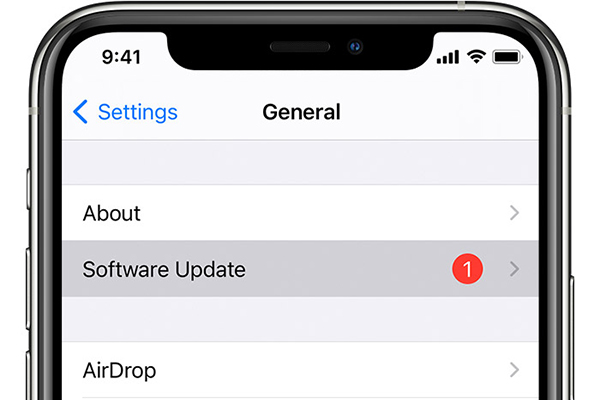
Step 1: Go to Settings > General > Software Update.
Step 2: If an update is available, download and install it.
Part 3. Fix iPhone Camera Not Working on iOS 18 in One Click
To address your iOS 18 camera problems more quickly, you might try using TunesKit iOS System Recovery. More than 150 iOS system problems can be repaired via TunesKit iOS System Recovery. Additionally, you can downgrade to iOS 17 or an earlier version with this program if you realize you don't like the iOS 18 system.
Key Features of TunesKit iOS System Recovery
- Fix iPhone Camera not working after iOS 18 update without data loss
- Go back to iOS 17 without iTunes
- Downgrade iOS 18 Beta to iOS 17 without losing data
- Enter or exit recovery mode for free
- Fix all kinds of iOS issues in minutes
- Ensures your device's security throughout the recovery process
How to fix iOS 18 camera not working on iPhone via TunesKit iOS System Recovery
Step 1Link your iPhone to TunesKit
The TunesKit program must be downloaded to your PC. Next, you may launch it on your PC and connect your iPhone to your PC using a USB cord so TunesKit can establish a connection. Click the iOS System Repair button and then click the Start button.

Step 2Select recovery mode
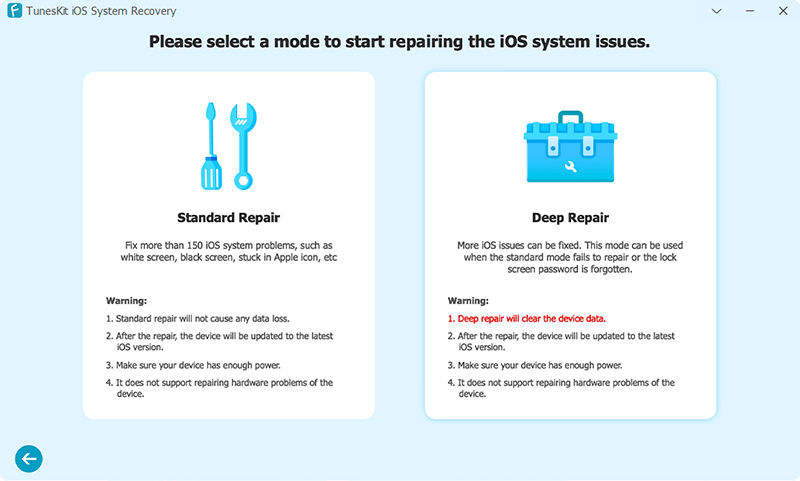
You can fix your iPhone using the Standard Repair mode without losing any data, whereas the Deep Repair option will erase all of your data even if it can address more serious issues than Standard Repair. Standard Repair is recommended here.
Step 3Download firmware package
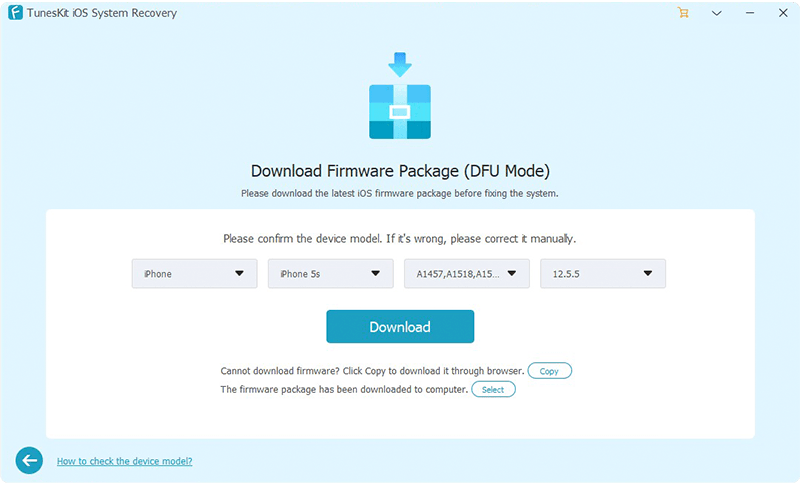
Once the repair option has been selected, you can verify that the information provided on this page is accurate. If there is no problem, click the Download button to download firmware package.
Step 4Fix iOS 18 camera not working on iPhone
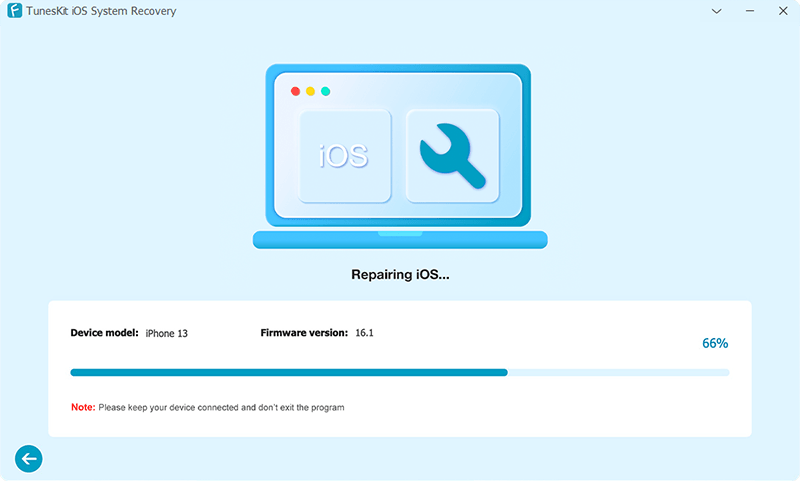
You can begin fixing your iPhone by simply clicking the Repair button. Wait a minute until the repair process is completed.
Conclusion
By following these troubleshooting steps, you should be able to fix the iOS 18 camera not working issue and get back to capturing moments seamlessly. The most popular remedy for this problem is TunesKit iOS System Recovery. If all else fails, remember that Apple Support is always available to help with more serious hardware concerns.
