How to Fix Apple ID Missing Age Information Error?
If you're encountering the error message, 'This setting cannot be changed because your Apple ID is missing age information,' it likely appears when configuring App Tracking Transparency (ATT). ATT is a feature that limits the data third parties can collect from your iPhone and is crucial for age-restricted apps. Despite no official acknowledgment from Apple, many users report this error even with correct age information. While it might be a software bug, this hasn't been confirmed. However, in this post, you will know the reasons and solutions for the Apple ID missing age information error issue. Keep reading to discover more!
Part 1. Why is my Apple ID missing age information?
Your Apple ID may be missing age information for several reasons:
1. Initial Setup Oversight
When creating your Apple ID, you may have skipped the step where you entered your birthday, or there was an oversight that led to incomplete information.
2. Recent Changes or Updates
If you've recently updated your Apple ID information, such as changing your name or email, the system might require you to re-enter your birthday to ensure all data is accurate and up to date.
3. Security Measures
Apple periodically checks accounts for completeness and may prompt users to fill in missing information as part of their security protocols to ensure accurate user data, which helps in account recovery and verification processes.
4. Family Sharing Requirements
If you're part of a Family Sharing group, especially as a child account, Apple needs to have accurate age information to enforce parental controls and comply with privacy regulations.
5. Software Glitches and Bugs
Sometimes, software glitches and bugs within iOS can also cause Apple ID age information to be missing.
6. Service Eligibility
Certain Apple services and features have age restrictions. Without a recorded birthday, Apple cannot determine if you're eligible to use these services.
Part 2. How to fix Apple ID missing age information error?
Fix 1. Log out and back into your Apple ID
First of all, you can try signing out of your Apple ID in the Media & Purchases settings. Please note that this method differs from the usual way of signing out of your Apple ID. Here are the specific steps.
Step 1: Open the Settings app on your iPhone, then tap your name at the top screen.
Step 2: Tap the Media & Purchases option.
Step 3: Tap Sign Out in the small pop-up window, then tap Sign Out again to confirm.
Step 4: Repeat the above steps to log back into your Apple ID.

Fix 2. Restart or force restart iPhone
A simple reboot can help solve a lot of minor system glitches and help refresh your phone's memory.
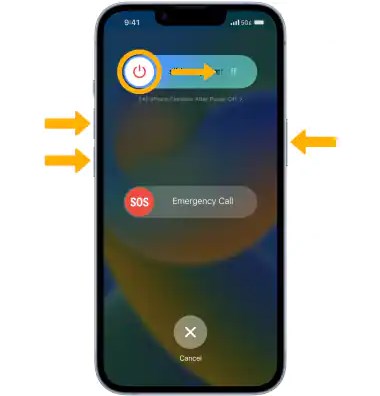
Step 1: Press and hold the power button and either the volume button until the "slide to power off" slider appears.
Step 2: Drag the slider to the right to power off the device.
Step 3: Once the iPhone is completely turned off, wait for a while, and press and hold the power button again until the Apple logo appears. This will restart your iPhone.
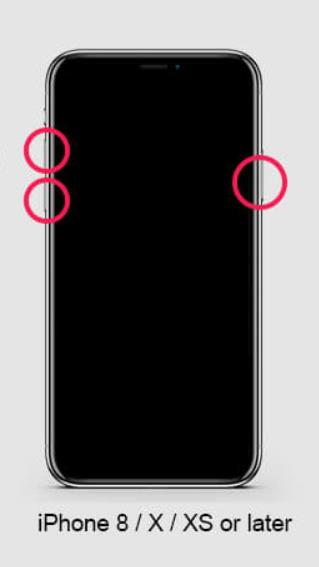
If restarting your phone doesn't fix the Apple ID age information missing issue, try a forced restart.
Step 1: Quickly press and release the Volume Up button. Do the same for the Volume Down button.
Step 2: Press and hold the side button (power button) until you see the Apple logo.
Fix 3. Update your Apple ID information
It's essential to have the correct age information associated with your Apple ID, as users must be 18 or older to enable App Tracking Transparency(ATT). After updating your information, perform a force restart as described above.
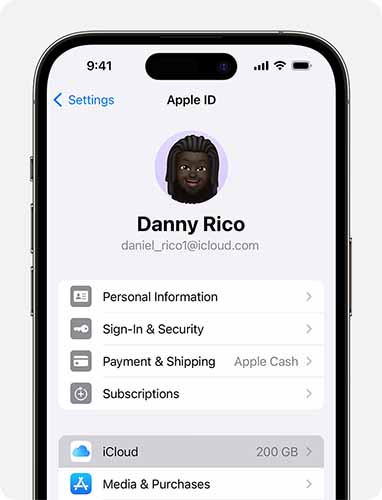
Step 1: Launch the Settings app on your iPhone, then tap your name at the top screen.
Step 2: Tap the Personal Information option from the list.
Step 3: Tap the Date of birth option, and select your birthday from the calendar.
Step 4: Tap the Done button in the upper right corner to save the changes.
Fix 4. Use TunesKit iOS System Recovery to fix iOS bugs
If the above methods don't solve the problem of your Apple ID missing age information, then it's possible that iOS is malfunctioning. Then TunesKit iOS System Recovery can do you a favor. It is an all-in-one iOS repair tool that can fix a wide range of iOS errors while preserving your data. For example, the iPhone is stuck in a boot loop, the iPhone is stuck on the Apple logo, white lines on the iPhone screen, etc. It comes with a clear and simple interface that will get your iOS device back to normal in just four easy steps. It is also compatible with all iPhone, iPad, and iPod touch models and supports the latest iOS versions. This software has the following highlights in addition to its powerful repair feature.
Highlights of TunesKit iOS System Recovery
- Fix Apple ID missing age information error without data loss
- Securely downgrade from iOS 17 without jailbreaking
- Reset your iPhone without a passcode, iTunes, or Finder.
- One-click to enter or exit recovery mode
- Fix more than 150 iOS issues on your iPhone/iPad/iPod Touch with or without data loss
Now follow the step-by-step tutorial to fix the Apple ID missing age information error using TunesKit iOS System Recovery.
Step 1Link iPhone to computer
Acquire this software on your PC, then link your iPhone to your PC via a reliable USB data cable. Select iOS System Repair on the main screen. On the next page, various device issues are on the list. If your iOS error isn't on the list, no worries, just click the Start button to move to the next step.

Step 2Choose Standard Repair
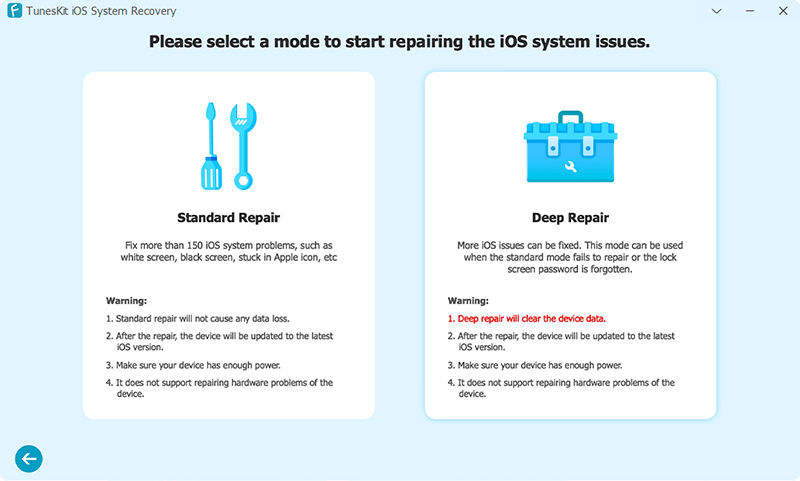
Two repair modes will appear on the screen for you to choose from. Standard Repair fixes your iOS device with data preserved, and Deep Repair fixes more complex iOS errors, but erases all data on your device. It is recommended that you choose Standard Repair.
Step 3Obtain the appropriate firmware package
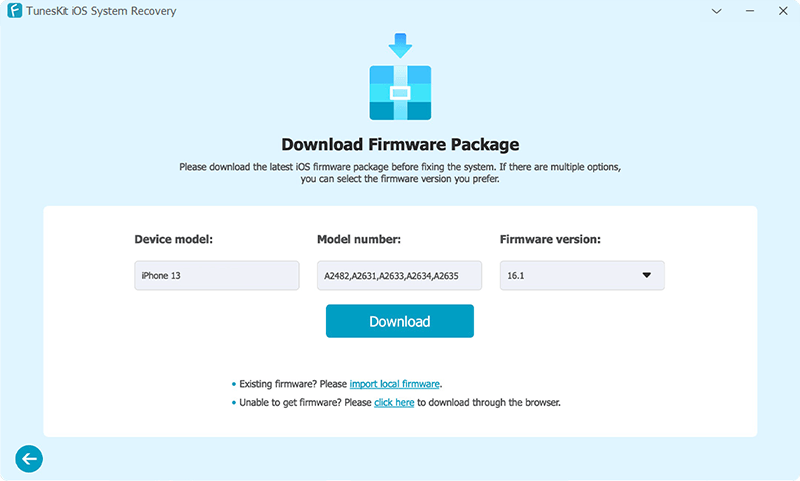
This software will automatically detect your device model and iOS version and you just need to select the appropriate firmware version from the menu and click on the Download button to download the firmware package.
Step 4Fix Apple ID missing age information error without data loss
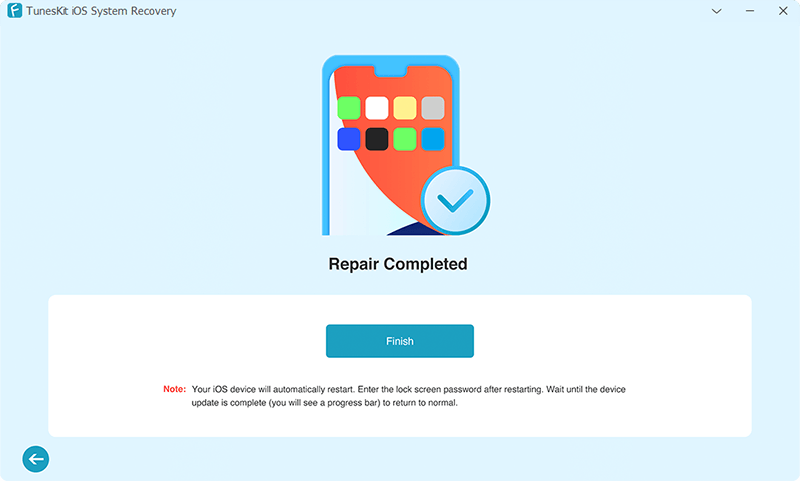
Click the Repair button when successfully downloaded the firmware package. TunesKit will automatically start fixing all the iOS glitches on your device. After the repair is complete, your iPhone will restart. Don't worry, there is no data loss from this process. You can then check if the problem has been resolved.
Part 3. How to add or update your age information?
To add or update your age information for your Apple ID, follow these ways.
Way 1: On the Apple ID Website
Step 1: Go to the Apple ID account page.
Step 2: Enter your Apple ID and password.
Step 3: Click on "Personal Information" under the "Account" section.
Step 4: Enter your birthday in the appropriate field and save the changes.
Way 2: On Mac
Step 1: Open System Preferences.
Step 2: Click on Apple ID.
Step 3: Select Name, Phone, Email from the sidebar.
Step 4: Click Edit next to Birthday.
Step 5: Enter your correct date of birth and click Done to save the changes.
Way 3: Using Family Sharing:
If you are part of a Family Sharing group and your account is managed by a parent or guardian, they may need to update your age information.
The family organizer can open the Settings app, tap their name, then Family Sharing, and select your name from the family members list to update your information.
After updating your age information, it's a good idea to perform a force restart on your device to ensure the changes take effect and resolve any lingering issues with App Tracking Transparency (ATT).
Part 4. Conclusion
Encountering the “Your Apple ID Is Missing Age Information” error can be frustrating, especially when trying to configure App Tracking Transparency (ATT) on your iPhone. In this post, several solutions are provided for you, such as logging out of your Apple ID via Media & Purchases, performing a force restart, and ensuring your Apple ID information is up to date. By following these solutions, you can likely resolve the error and enable ATT, allowing you to control the information third parties collect from your device and use age-restricted apps seamlessly. Numerous users have reported it, suggesting it may be a software bug. Take full advantage of TunesKit iOS System Recovery is always your best choice.
