Complete Guides: Fix iPod Touch White Screen with 7 Methods

When the latest system or the newest version of an application on iPod touch is available, we always tend to update it so that we can enjoy a fresh service that the older version doesn't possess. However, the process may get failed at times and a white screen displays on iPod touch when we are updating the devices.
There are no icons or anything else on the iPod touch's screen. No matter how many times you hit the Power button or the Home button, it still shows a white screen. iPod Touch 1st, 2nd, 3rd, 4th, 5th, and 6th generation all have the chance to freeze at the white screen of death if it displays the image above. In this case, how do we fix this issue? Well, this article will present you with seven efficient methods to solve the problem of iPod touch white screen of death.
Part 1. Why Does My iPod Touch Only Show a White Screen?
Before getting to the following solutions, we should understand the reasons why iPod touch displays a white screen. Two main causes can be used to explain it.
1. Software update or jailbreak failed. A common situation is that an iPod touch stuck on white screen when an error happens during updating or jailbreaking the iOS system.
2. Hardware issues. Another general circumstance is the link between the iPod touch's screen and motherboard gets loose after it was dropped.
Part 2. How to Fix an iPod Touch That Has a White Screen?
Now firstly let's look at some possible solutions to work out iPod touch white screen with lines problem. Please check as follows here.
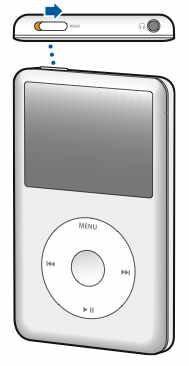
2.1 Check the Hold Switch
It is the first thing for you to make sure your device doesn't have the hold switch on when you see a white screen on iPod touch. I know, I know, this seems silly, but I've been fallen victim to this more than once. You can now try to operate the buttons after unlocking the Hold. Regardless of whether the Hold was locked or not, set it to lock and then unset it.
2.2 Charge Your iPod Touch
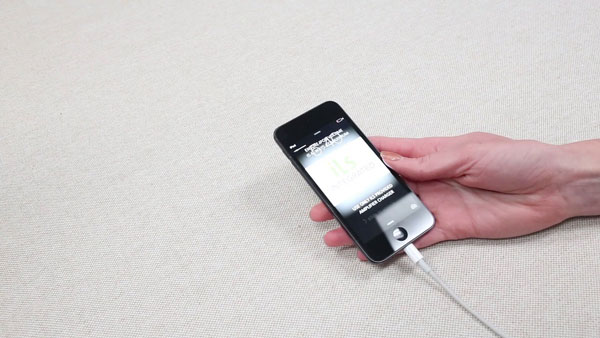
Just plug it in and come back to check in a few hours. Did you hear that? On recent iPods, a seriously low battery can prevent the iPod from even appearing in iTunes for 30 minutes? Let's continue then. You can complete this process by following the steps. Let the iPod touch charge for a while if it shows low battery after plugging in.
Step 1: Make your iPod touch connected with a USB cable.
Step 2: Charge the device by plugging it into the wall power output. Plug the iPod touch into a computer with a USB cable if a wall charger does not work.
Step 3: A lightning bolt that shows it is charging will appear. Please leave your iPod touch 4th generation charge for some minutes if there is a low battery reminder.
2.3 Force Restart iPod Touch
If your iPod touch is still unresponsive after trying out the first way, then a message that reads "I see Accessory Not Supported or Certified" will be displayed. Under this condition, you have to force restart the device. Using this method won't cause your music or data to be lost, but don't do it while the system is connected to the computer. Be patient, cuz sometimes it can take multiple tries.
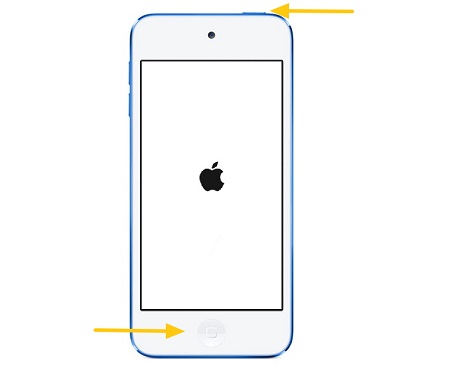
Step 1: Locate the Home button on the iPod touch.
Step 2: Identify the Power button.
Step 3: Press and hold the Home and Power buttons simultaneously for about 30 seconds.
Step 4: The iPod touch will begin rebooting when the Apple logo appears.
If you cannot use the home button or nothing happens after forcing a hard restart for your iPod touch, move on to the next method.
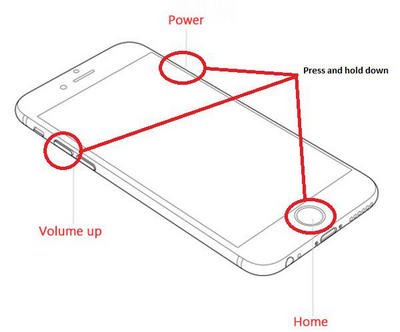
2.4 Press Home + Volume Up + Power
If hard resetting your iPod touch doesn't do the trick in dealing with the iPod touch white screen issue, you can try another combination of buttons that may works. Here are the related steps.
Step 1: Find the Home, Power, and Volume Up buttons.
Step 2: Hold the three buttons at the same time till the device turns off and the Apple logo shows.
Step 3: Release them and your iPod touch will be restarted.
2.5 Try Another USB Port on Computer
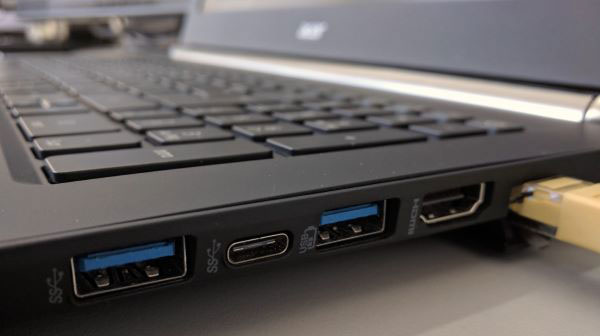
Another method to fix white screen on iPod touch is to plug your iPod into another USB port on your computer. Honestly, this probably won't work, but we're about eliminating the variables, so move forward! If changing the USB port on the computer did not help, the next method that may assist you to solve the issue.
2.6 Restore iPod Touch Through iTunes
Let us look at the sixth way to resolve iPod touch white screen with lines. That is restoring the device with iTunes. WAIT!!! This way will delete all settings and all of the songs, videos, and data on your iPod touch, so it's better to have your data backed up before you proceed in the following steps. It's a sensitive procedure. You should follow Part 3 if you do not have a backup and do not want to lose any data.
Here is what you can do to restore iPod touch with iTunes:
Step 1: Open the latest iTunes.
Step 2: Use a USB cable to connect the iPod touch with iTunes.
Step 3: Tap the device after it is detected.
Step 4: Click Restore iPod button in Summary tab.
Step 5: Click Restore button when below notification pops up.
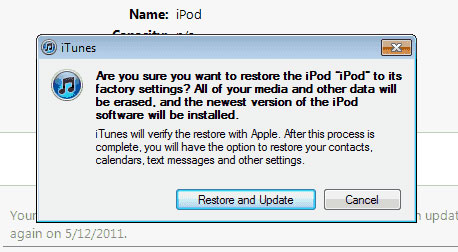
However, some users reported that restore doesn't work, "iPod touch white screen" issue persists. Yes, not everyone has been so lucky, but let's not give up hope. Fixing iPod touch, iPhone or iPad stuck on white screen of death, users tend to believe in TunesKit iOS System Recovery. That is a great program telling you what to do when your iPod touch screen goes white.
2.7 Contact Apple Support
If you still cannot get rid of the iPod touch white screen issue by using the above 6 methods, there might be hardware damage on your iPhone. Taking the assistance of Apple officials or professional mobile device technologists is the optimal choice for you in this case. Also, you can send your phone to a Genius Bar for a screen repair service.

Part 3. What to Do If iPod Touch Screen Is White? [Highest Success Rate]
The above fixes are not completely guaranteed, so there is a better fix to solve the white screen for iPod touch 4th generation or other models with a higher success rate. It's wise to apply third-party professional iOS system recovery tools like TunesKit iOS System Recovery. That's a relatively popular program to bring your iOS system back to normal with almost every problem solved. It fixes all iOS and tvOS system issues including iPod touch white screen with lines, white Apple logo, iPhone grey screen, ghost touch, Apple TV issues, etc.
Besides, there is no data loss after the reparation with standard mode. Finally, it supports diverse devices like iPhone, iPad, iPod touch, and Apple TV, and all iOS versions, including the latest iOS 16. Want to get out of your trouble with iPod touch? Here's what to do.
Key Features of TunesKit iOS System Recovery
- Fix iPod touch white screen issue with no data loss
- Repair 150+ iOS system problems on iPhone, iPad, iPod
- Fully support the latest iPhone models including iPhone 13
- Intuitive interface and simple to operate
- Available for both Windows and Mac platforms
Step 1Installation and Connection
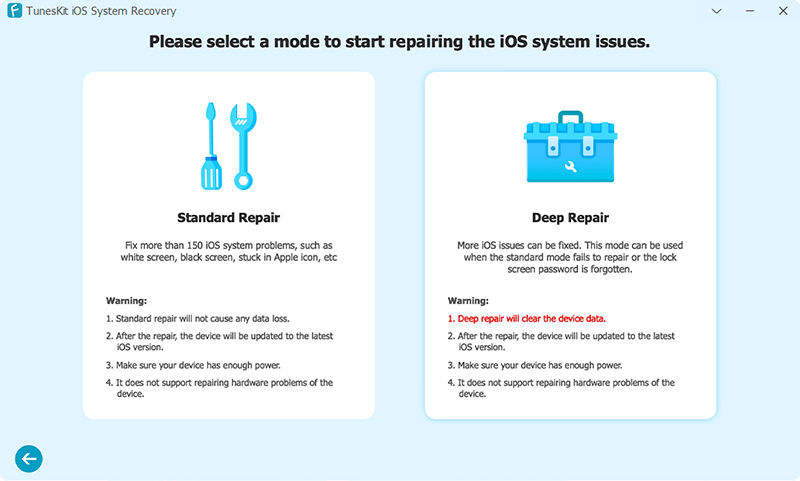
Firstly, open TunesKit iOS System Recovery for Windows on your computer. Then you have to connect your iPod touch till it's detected. Next, click the "Start" button. Next, choose the "Standard Mode". You have to select which device you've connected to. Then follow the instructions from the interface and let your device is into DFU mode. After that, click the "Next" button.

Step 2Download Proper Firmware Package
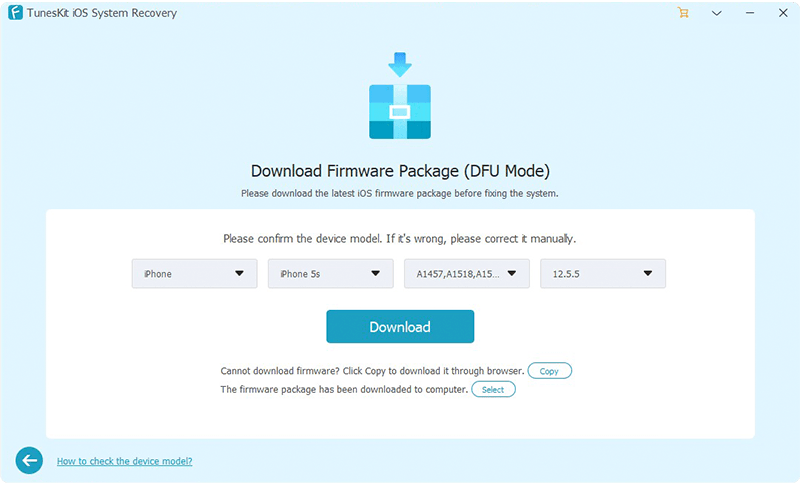
The application will download the firmware package matched to your device after finishing the first step. Before that, check your device info if it is correct, including the model version, iOS version, etc. If all information is correct, click the "Download" and it will start downloading and verifying the firmware.
Step 3Fix iPod touch White Screen Issue
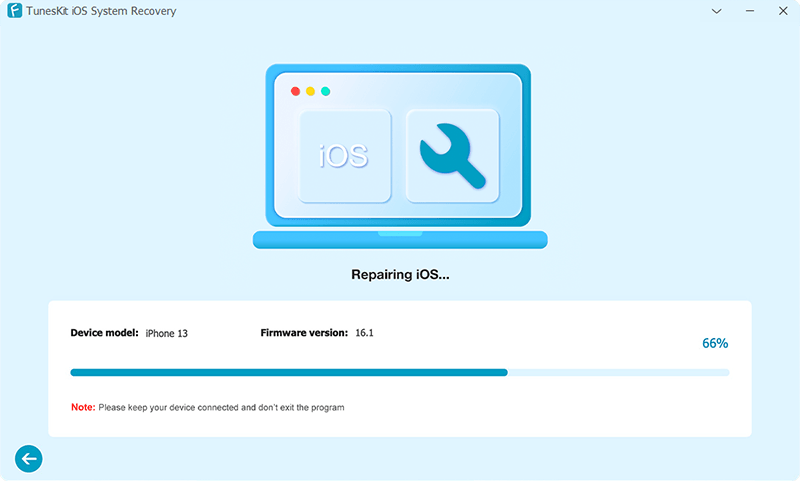
When the firmware has been downloaded successfully, you just click the "Repair" button and the program will automatically begin to fix your iPod touch. Don't disconnect your device until the process is completed. Otherwise, the device might become bricked.
Part 4. How to Fix iPod Touch White Screen: Conclusion
These seven ways can fix your iPod touch white screen issue and you can choose the one you would like. If you followed these steps above and use TunesKit iOS System Recovery, with the confidence that you have done everything on your end to solve the problem. We sincerely hope that this article can be helpful for you. If you have other better alternatives or any problems in using the above methods, please let us know and we would be very appreciated to help you.
