Top 7 Tips to Solve iTunes Error 2009 Problem
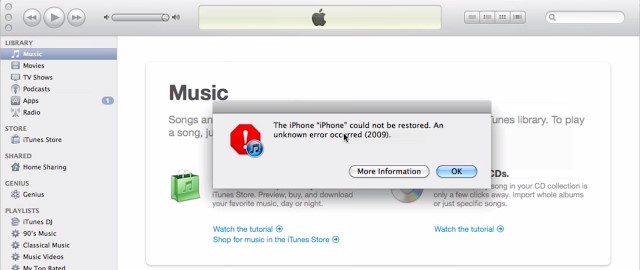
Among a list of iPhone or iTunes errors, the error code 2009 on iPhone is a common one. When some iOS device users want to update or restore their iPhone, iPad or iPod via iTunes, they find a message that reads "The iPhone (iPhone) could not be restored. An unknown error occurred (2009)" popping up. This error stops people from completing the process of iPhone restoration. Would like to settle the problem of iTunes error 2009? Please check out following 7 solutions.
Part 1: What is iTunes Error 2009 and Why Does It Happen?
Let's make clear what iTunes error 2009 is first. iTunes error 2009 is an issue which is often caused by some hardware problems including USB cables, displays or even the computer. Here are some possible causes of that error.
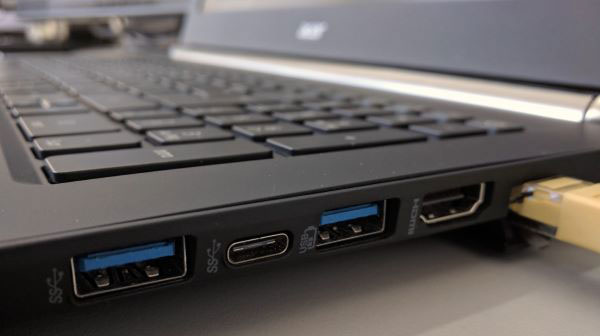
1. USB or Cable Issues: A faulty or incompatible USB cable, or a problematic USB port, can disrupt the communication between your device and computer, leading to error 2009.
2. iTunes or System Software Problems: Outdated, corrupted, or mismatched versions of iTunes or macOS/Windows software can cause connection problems, preventing your device from syncing.
3. Antivirus Programs Interference: Antivirus programs, firewalls, or network security tools can block the connection between your device and iTunes, which may trigger error 2009.
4. Device or Operating System Issues: If your device is in an unstable state (e.g., low battery, recovery mode), or if there's a glitch with the operating system, error 2009 might occur during updates or restores.
Part 2: How to Fix iTunes Error 2009?
In this part, we are going to discuss concrete solutions to the error 2009 and guide you steps by steps.
Tip 1: Check USB Connection
Generally, people tend to ignore the simplest issue. So check the USB connection by plugging every USB port of your computer or changing Apple USB cables to see whether the USB port is working fine.
Tip 2: Restart Computer or iPhone
This method is widely accepted by customers when some problems occurs on digital devices. Indeed, restarting computer or iPhone often does the trick. So once iPhone error 2009 happens, you are suggested to reboot your computer and then restart updating or restoring iPhone again. If the issue still exists after rebooting the computer, then try to restart the iPhone. Here is the way to restart your iPhone.
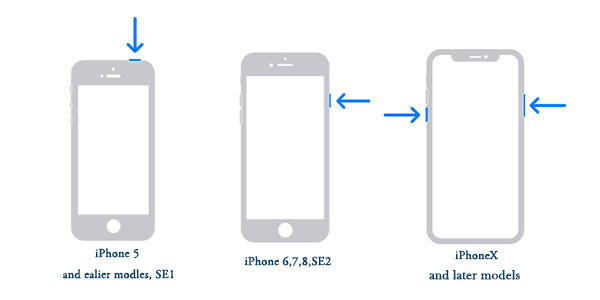
For iPhone without Home Button: Press and hold the Side button and one of the Volume buttons until the "slide to power off" slider appears. Slide the slider to power off your iPhone and then restart it after it turns off for a few seconds.
For iPhone with Home Button: Press and hold the Top (or Side) button until the "slide to power off" slider appears. Slide the slider to turn off your iPhone. Turn it on after you turn it off for a few minutes.
Tip 3: Update or Reinstall iTunes
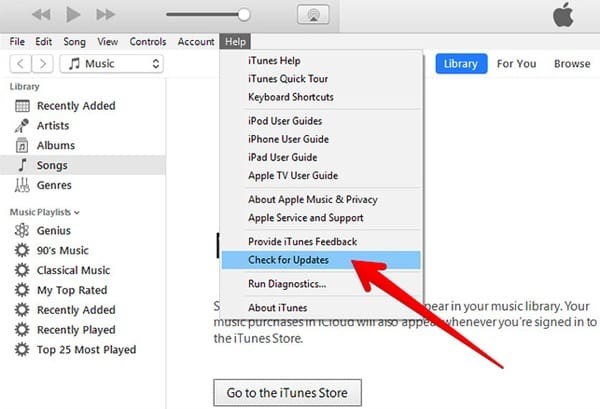
If the first way fails, don't be gloomy. Try updating iTunes or reinstalling it. To install the latest iTunes, first check if an update is available, try these:
For Windows PC:
Step 1: Open iTunes on the computer.
Step 2: Tap Help icon on the top.
Step 3: Click Check for Updates.
Step 4: Follow the guides.
For Mac:
Step 1: Open iTunes.
Step 2: Click system references in Apple icon.
Step 3: Click Software Update.
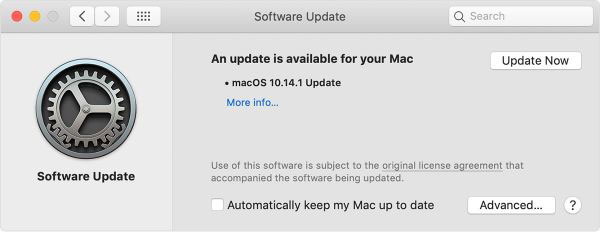
If it doesn't work, try deleting the iTunes from computer and reinstalling it again.
Tip 4: Turn Off iTunes Helper
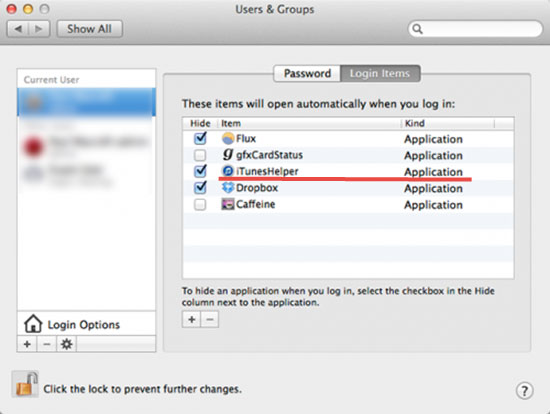
Apart from using above two tips, disabling iTunes helper is also worthwhile to try out to settle iTunes error 2009. Do as presented here both on Mac and Windows computer.
On Mac:
Step 1: Click System Preferences.
Step 2: Tap Users and Groups.
Step 3: Log in your account by inputting the username.
Step 4: Disable iTunes Helper.
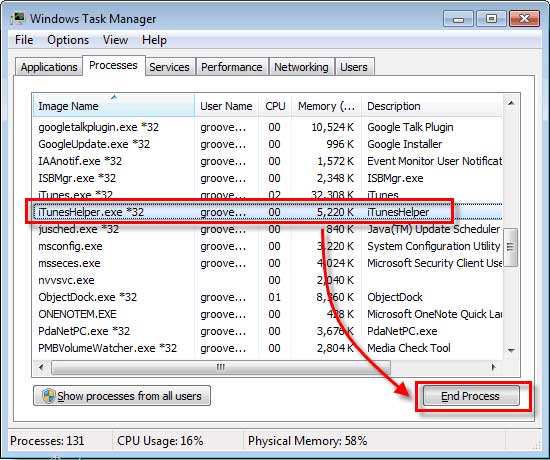
On Windows:
Step 1: Tap Start and open Run button. (or press Win+R)
Step 2: Type MsConsfig and click Enter.
Step 3: Find the iTunes Helper and hit the End Process.
Tip 5: Update Antivirus Protection Program
It is not often occurred to us that antivirus software may cause a problem. Yet an old antivirus protection program may sometimes bring about some issues as other outdated applications make iPhone not function normally at times. So in order to solve iTunes error 2009, open the antivirus program and see whether an update is available. If so, do the update and see whether any miracle would happen.

Tip 6: Use iOS Repair Software
If you still exhaust yourself in seeking solutions to fix iPhone error 2009, then the safest way is using professional iOS recovery programs like TunesKit iOS Repair. This tool offers the iTunes Repair feature that can fix more than 210+ iTunes errors including iTunes error 2009.
Additionally, TunesKit iOS System Recovey supports diverse kinds of iOS issues including iPhone recovery mode, white Apple logo, black screen, Apple TV issues etc. It supports diverse devices like iPhone, iPad, iPod touch and Apple TV, and all iOS versions, including the latest iOS 18.
Highlights of TunesKit iOS System Recovery
- Fix 210+ iTunes errors on any iOS devices like iTunes error 2009
- Only one-click to enter or exit recovery mode for free
- Supports downgrading iOS 18 to iOS 17
- With easy steps to solve problems under Standard and Advanced modes
- Supports the latest iOS version including iOS 18
Related steps to fix the problem of iTunes error 2009 are as follows.
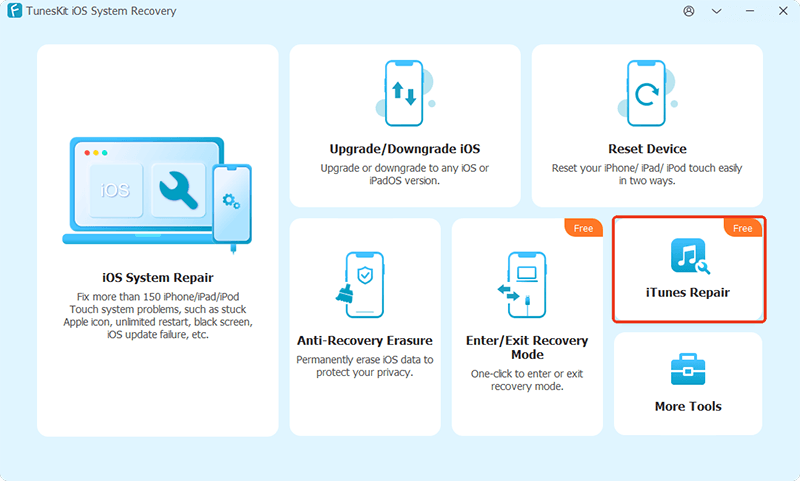
Step 1Connect iPhone and Select Repair Feature
Firstly, open TunesKit iOS System Recovery for Windows on your computer. Then select iTunes Repair (Windows) or Repair Sync Errors (Mac) on the homepage.
Step 2Detect iTunes errors
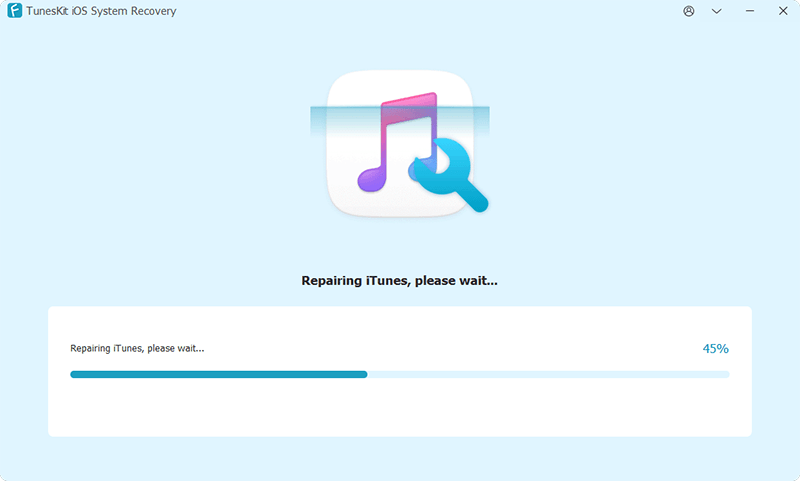
The application will start detecting iTunes. When it finds any problem, you can click the Repair button to fix your iTunes.
Step 3Apply repair
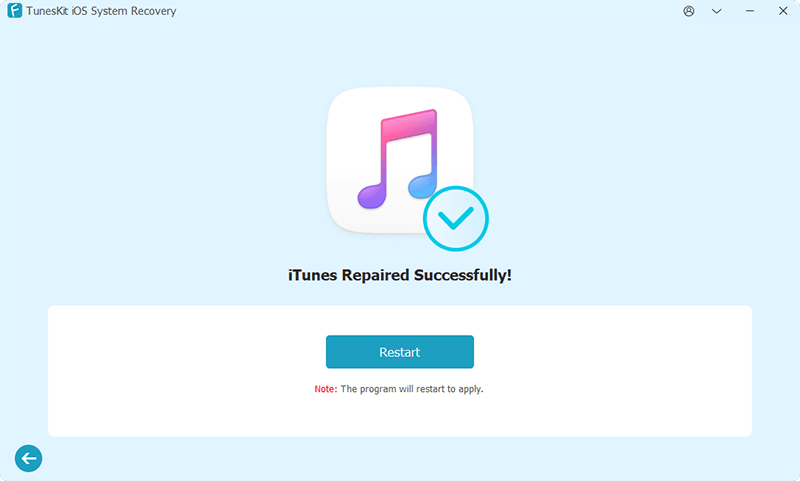
After the repair process finishes, click Restart (Windows) or Done (Mac) on this windows to apply the changes.
Tip 7: Take to Repair Store
If unfortunately above 6 methods don't help you to settle the iPhone error 2009 problem, then you may have to take your device to a repair store. Related workers will give you suggestions.
Part 3. Video Tutorial: How to Fix iTunes Error 2009
Part 4: Final Words
This article has shown you the fastest and safest way, TunesKit iOS System Recovery, as well as other possible solutions to fix your iTunes errors. In this way, when faced with iPhone or iTunes error 2009 in the future, you have no need to worry. Just check this and choose the one you want to solve the problem. Finally, if you have other advice or some questions, please feel free to contact with us.
