- Utility
- Multimedia
- Freeware
- Support
- Download Center
- Shop
Before get started, please make sure you've already installed the jailbreak tool (checkra1n) successfully. Then follow the instructions below to jailbreak your iPhone, iPad, or iPod touch step by step.
Now you've burned the jailbreak tool to the USB flash drive, you can start to boot your system into a jailbreak environment first.
Step 1. Click the "Restart" icon at the bottom right corner of the TunesKit program, or go to the "Windows" > "Restart" to restart your computer.
Step 2. When the computer is powered on and before the operating system is loading, press the F12 shortcut key several times, in order to enter the Boot Menu.
Note 1: For most branded computers, the shortcut key is F12. If it is invalid, you can try F10, F9, F8, etc. or try to figure it out by yourself. The following list is for your reference.
| Desktop Brand | Laptop Brand | Motherboard Brand | |
| F12 | Lenovo, HP, Acer, Hasee, eFound, THTF, Haier | Thinkpad, Dell, Lenovo, TOSHIBA, Samsung, IBM, Acer, Hasee, Haier,eFound, THTF, GIGABYTE, Gateway, eMachines | GIGABYTE, Intel, Cthim, SOYO, FOXCONN, Gamen, Topstar |
| F11 | MSI | MSI, ASRock, ONDA, Colorful,ECS, Gamen, Topstar | |
| F10 | ASL | ||
| F9 | HP, BenQ | BIOSTAR, GUANMING | |
| F8 | ASUS, BenQ | ASUS, YESTON, J&W | |
| ESC | Dell | ASUS, Sony | MAXSUN, UNIKA, SUPOX, Spark, SOYO, EPOX, UNIKA, Jet way, J&W, Colorful, ECS, SOYO, FOXCONN |
Note 2: If you still can't start Boot Menu, please try to enter your COMPUTER BIOS / UEFI Mode where you can change the system boot settings in order to go into checkra1n. (See my Tested Tutorial below)
Step 3. In the Boot Menu, select the USB flash drive you just used to installed the checkra1n.
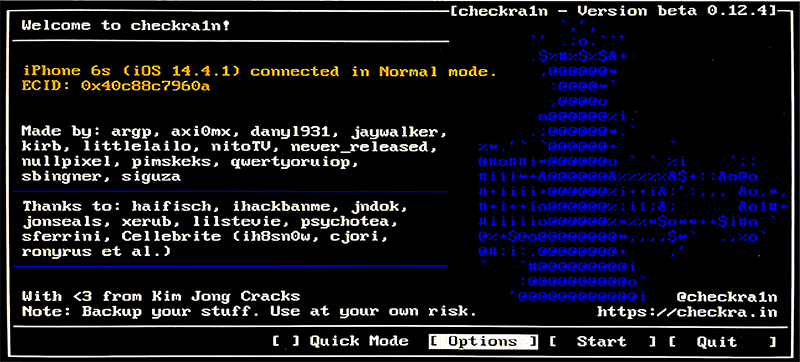
Step 4. Then you'll see the main interface of checkra1n below, it means the computer is now in the jailbreak environment.
Tested Tutorial:
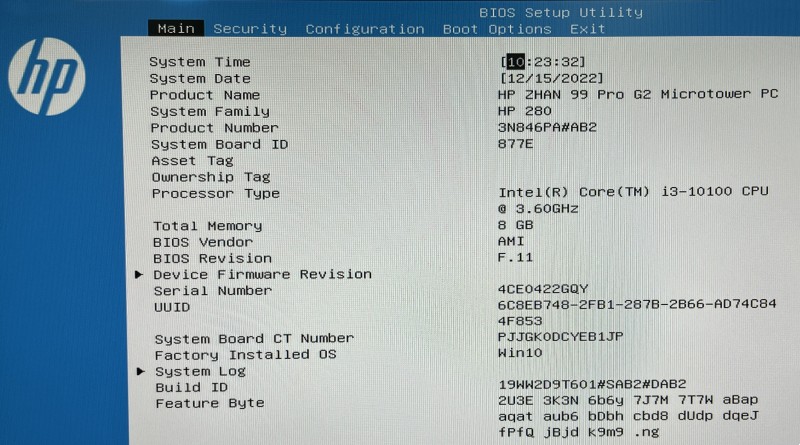
Here my computer is HP, and I'll take it as an example to show you how to open the checkra1n app and create a jailbreaking environment.
Step 1. When restarting my computer, I press the F10 and enter the BIOS setup interface as below.
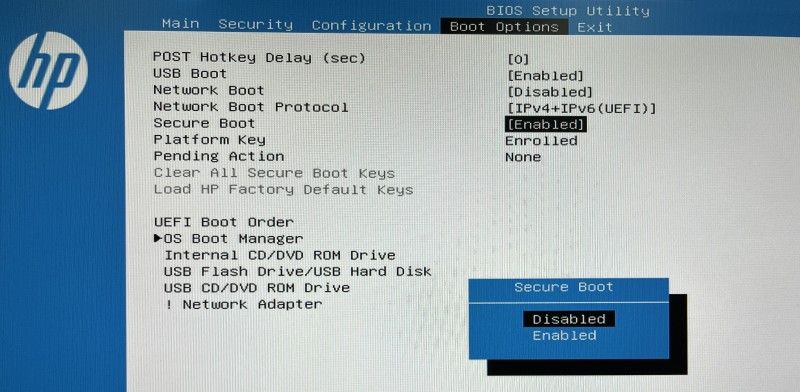
Step 2. Use the keyboard arrow keys to navigate and press the Enter key to select the Boot Options. Disable the Secure Boot, and press Enter to select Disabled.
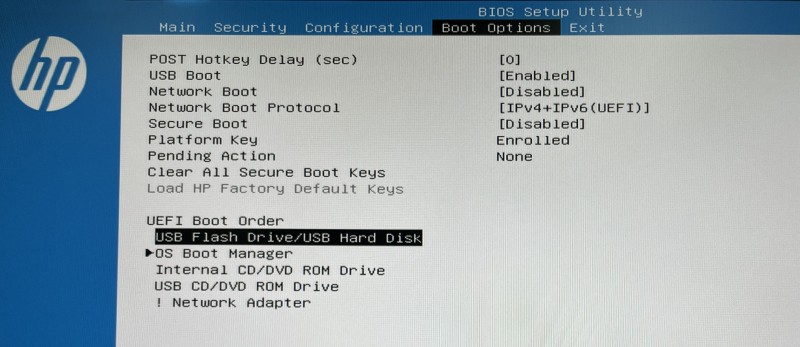
Step 3. Use F5 and F6 keys to select the UEFI Boot Order and make the USB Flash Drive/USB Hard Disk in the first place.
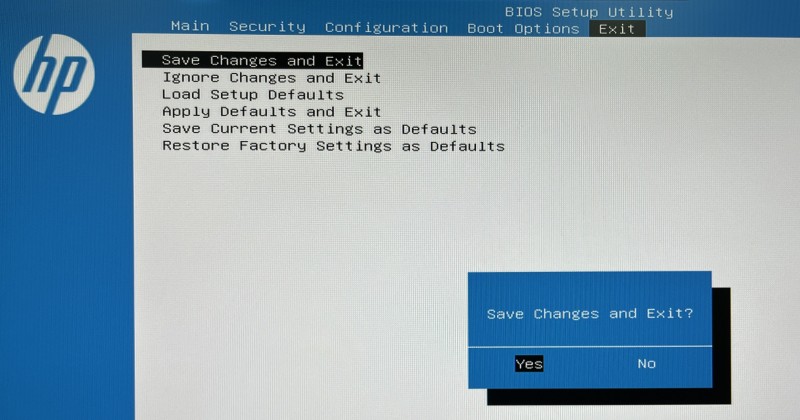
Step 4. Move to the Exit in the top menu bar and select Save Changes and Exit. Press Enter and select Yes.
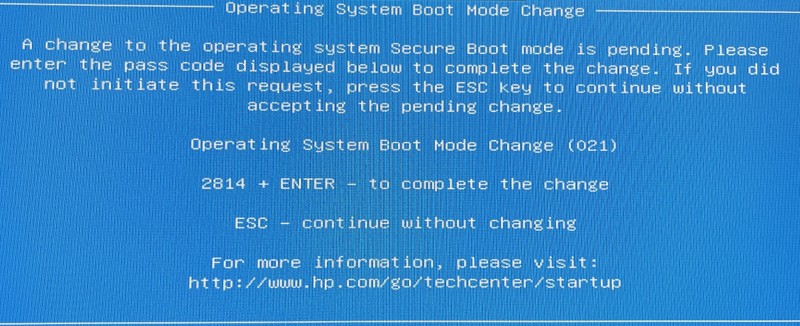
Step 5. Wait for a moment, and then follow the onscreen instruction to confirm your change. Press Enter.
Step 6. Now I press the Alt+F2 to select the jailbreak tool.
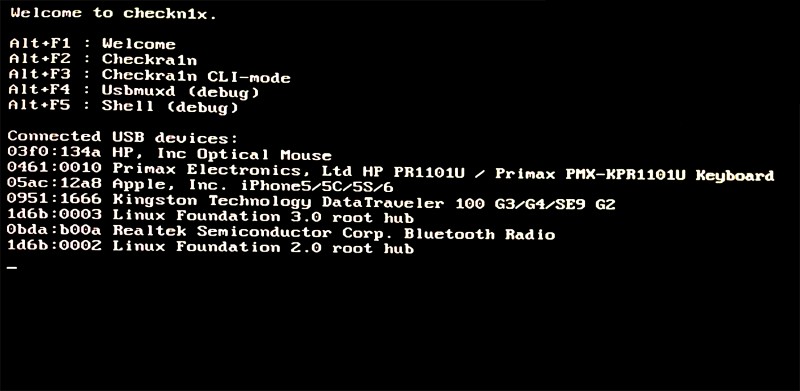
Now your computer is in the jailbreak environment, and it's time to jailbreak your iOS device.
Step 1. Make sure your iOS device is still connected to the computer. Use the keyboard arrow keys to select the Options, and then press the Enter.
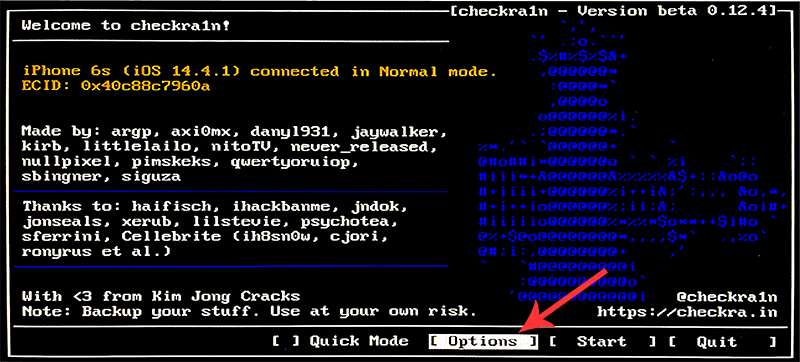
Step 2. On the Settings screen, move your keyboard arrow keys to select the "Allow Untested iOS/iPadOS/tvOS versions" options, and then press the Enter.

Note 3. For iPhone 8, 8 Plus, X with iOS 14, you need to check both "Allow untested iOS/iPadOS/tv OS versions" and "Skip A11 BPR check" items.
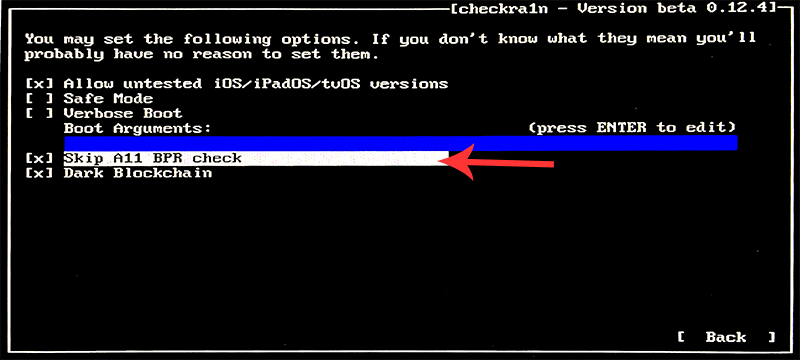
Step 3. After that, hit the Back button and press the Enter to return to the main interface.
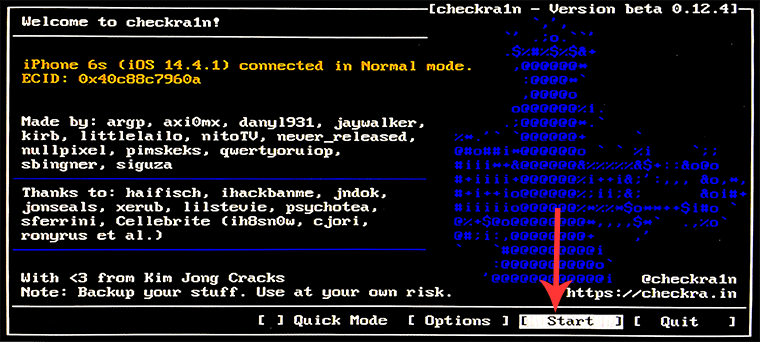
Step 4. Now press the Start button and hit the Enter to jailbreak your iOS device.
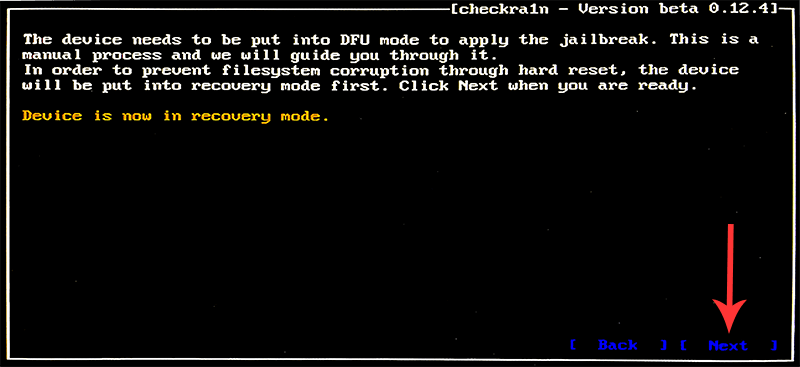
Step 5. The checkra1n requires you to put your device into DFU mode manually. Hit the Next. And it will automatically put your device into recovery mode first.
Step 6. Wait a while until the process is done. Now check the Next option. Follow the instructions and click the Start button to put your device into DFU mode.
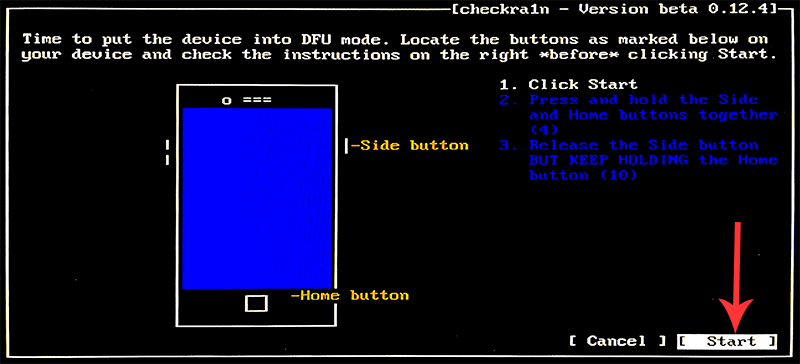
Step 7. After it enters the DFU mode successfully, checkra1n will start jailbreaking your device automatically. The process will take a moment.
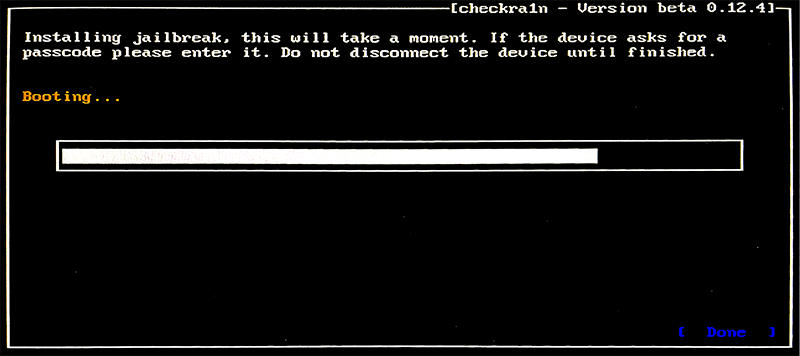
Step 8. Keep your device connected during the process. When it's completed, press the Done and unplug your USB flash drive.
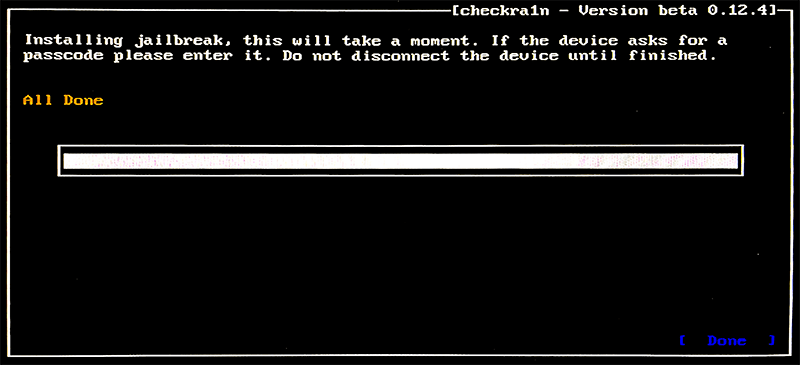
Step 9. Now your iOS device is jailbroken. Then you can hit the Ctrl + Alt + Delete shortcut keys to restart the computer and continue using TunesKit Activation Unlocker to bypass activation lock.