Effective Ways to Change Weather Location on iPad
Are you seeing the wrong weather forecast on your iPad? Whether you've moved to a new city or simply want to check the weather in another location, adjusting the weather app settings on your iPad is quick and easy. This guide will walk you through the simple steps to change the default weather location on iPad, ensuring you're always up to date with the right forecast, wherever you are. Without dilly-dallying much, let's begin!
Part 1: What Can the iPad's Weather App Do For You?
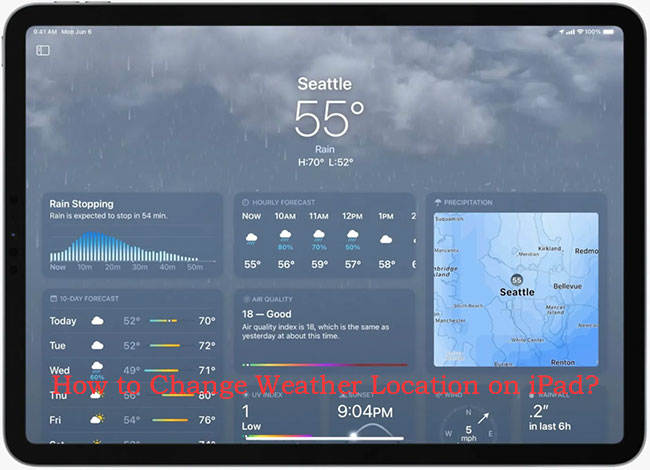
The Weather app on the iPad provides detailed weather information with various features to help you stay informed. Here's what it can do:
1. Current Weather Conditions: You can view real-time temperature, humidity, wind speed, and visibility for your location or other cities you add. It provides a simple overview of current conditions, including a summary of the weather for the day.
2. Hourly and 10-Day Forecasts: The app gives you a detailed breakdown of the weather forecast for the next 24 hours and a 10-day outlook. This includes temperature trends, chances of precipitation, wind, and more.
3. Severe Weather Alerts: You'll receive notifications about severe weather conditions like thunderstorms, heavy rain, or extreme temperatures, depending on your location. These warnings help you stay prepared for emergencies.
4. Interactive Radar and Maps: The app offers radar maps that show precipitation, temperature, and air quality in real-time. You can zoom in and out to track weather patterns and get detailed views.
5. Air Quality Information: The app provides air quality data, including an index that shows whether the air is safe or poses a risk, along with pollutant details like ozone levels or particulate matter (PM2.5).
6. Precipitation and Snow Accumulation Graphs: It offers detailed graphs to show the expected amount of rain or snow in the coming hours, so you can plan around potential storms.
7. UV Index: The UV index is displayed to help you understand the strength of the sun's ultraviolet rays, which is useful for determining sun protection needs.
8. Sunrise and Sunset Times: The app includes details about when the sun will rise and set, which can be useful for planning outdoor activities.
9. Multiple City Tracking: You can track weather conditions in multiple locations at once, perfect for checking weather for upcoming trips or monitoring distant friends and family's weather.
10. Widgets: The iPad's Weather app supports widgets, allowing you to view the weather on your home screen without opening the app.
These features help provide a comprehensive weather overview and allow for better planning based on current and upcoming weather conditions.
Part 2: How to Change Weather Location on iPad?
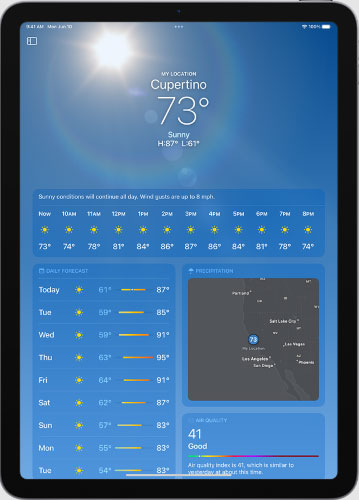
There are several methods to change the weather location on your iPad. Simply choose the one that best fits your needs.
Method 1. Type the desired location in the search bar
Need to check the weather in a different location without being there? The good news is, you can! The iPad's Weather app allows you to view weather updates from any location by simply searching for it. Follow these easy steps to get started.
Step 1: Launch the Weather app from your home screen.
Step 2: In the top-right corner of the Weather app, you'll see an icon resembling three stacked lines or a list. Tap on that to open the location list.
Step 3: In the search bar, type the name of the city or location you want to add. You can also enter a ZIP code or postal code. Select the location from the search results to add it to your list.
Step 4: Once you've added multiple locations, simply tap on any location from the list to switch and view the weather for that area.
Step 5: The app will automatically show the weather for your current location if location services are enabled. If you want to set a specific location as your default, drag it to the top of your location list by pressing and holding the location, then moving it upward.
Step 6: To remove a location, swipe left on the location in the list and tap the Delete button that appears.
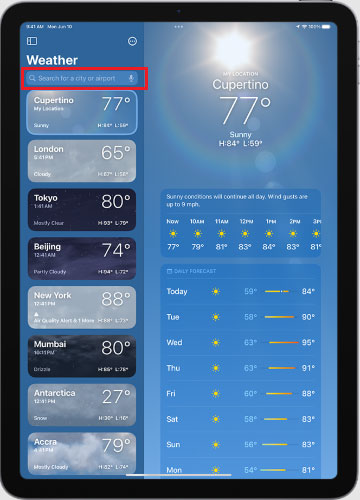
This allows you to customize your weather app by adding, switching, or removing weather locations as needed.
Method 2. Use the widget to change the weather app's primary location
If you have the weather widget on your iPad's home screen, you can easily adjust the location settings directly from there. It’s a simple process! Follow these steps to change the weather location on your iPad using the home screen widget:
Step 1: Locate the Weather widget on your iPad's home screen. Touch and hold it for a few seconds until a hidden menu appears.
Step 2: Select Edit Weather.
Step 3: Tap Location and enter your desired location in the search bar. Choose from the suggested results.
Step 4: The widget will immediately update to display the new location.

If the Edit Weather option isn't available, try updating your iPadOS. The Weather app is relatively new on iPad, so Apple is continuously improving it with updates.
Part 3: How to Change Location on iPad?
Accurate location settings are crucial for receiving correct weather updates. Occasionally, your device may get stuck on an incorrect location. In such cases, it can be challenging to update it to the right area.
If standard methods for changing the weather location on your iPad's home screen aren’t working, you can try using TunesKit Location Changer, a professional tool for changing your device's location. What can it do for you? It provides real-time GPS updates to ensure accurate location simulation. It comes with the user-friendly interface makes it easy to navigate and use effectively. What’s more, it offers reliable technical support to assist users with any issues or questions you may have.
Key Highlights of TunesKit Location Changer
- Spoof your device's GPS location in one click
- Fake location on Find My Friends
- Turn off location tracking on iPhone
- Simulates GPS movement with customizable routes and adjustable speeds
- Works with a wide range of iOS & Android devices
- Compatible with location-based apps like Pokémon GO, Mobile Hunter, Life360
Here's how to do it:
Step 1 Download and Install TunesKit Location Changer
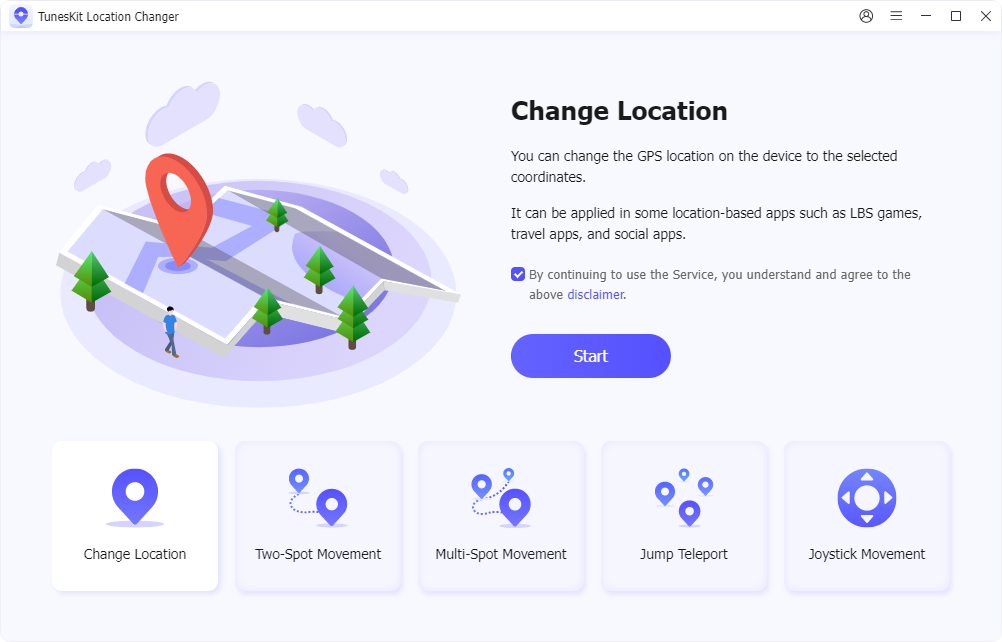
Launch this program on your PC. Connect your iPad to your computer using a USB data cable. Enter your iPad lock screen passcode to trust your computer. Read and agree to the disclaimer. Choose the Change Location mode and hit the Start button to move on.
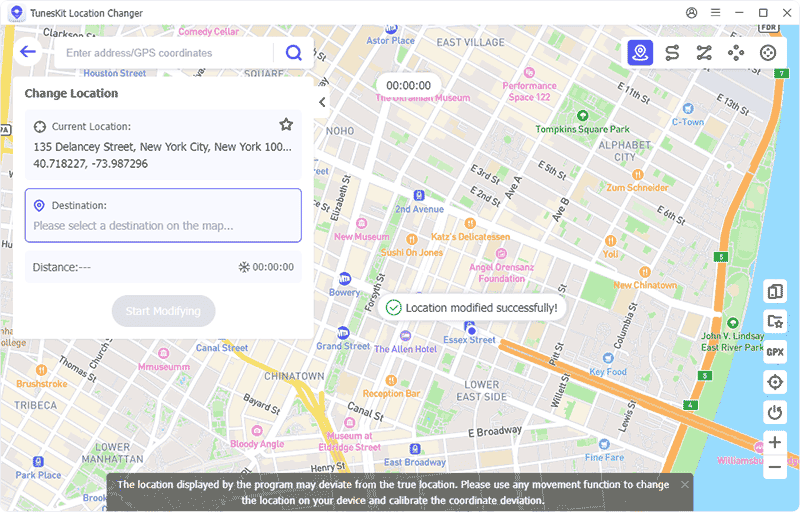
Step 2 Select Your New Location
In the search box, type the location you want. Once you've selected your desired area, click the Start Modifying button, then all location-based apps, including the Weather app, will update to reflect the new location.
Closing Thoughts
The iPad’s Weather app updates based on your current location, provided your location settings are correctly configured. However, if you need to manually change your location for any reason, it's a simple process. The guides above offer clear steps on how to change the weather location on your iPad. Just follow the instructions carefully to complete the process. If you need to change your iPad’s location for any reasons, then TunesKit Location Changer is your optimal choice. Click the download button below to explore its powerful feature.
